Cherry MX Board 6.0 hands-on review

IMG_4691

Today we’re taking a look at the latest keyboard from Cherry, the MX Board 6.0. When we last looked at a Cherry keyboard, it was the MX Board 3.0. We found that to be a nice keyboard with unusual low-profile keycaps, and so I’m excited to see what innovations Cherry have packed into the new model. Let’s get started!

Features & Specifications

  • Cherry MX red switches with NKRO
  • RealKey fully analogue signal processing
  • Red backlighting (100 brightness levels)
  • Media, backlighting adjust and Windows lock keys
  • Aluminium (sanded-finish) housing
  • Removable wrist rest
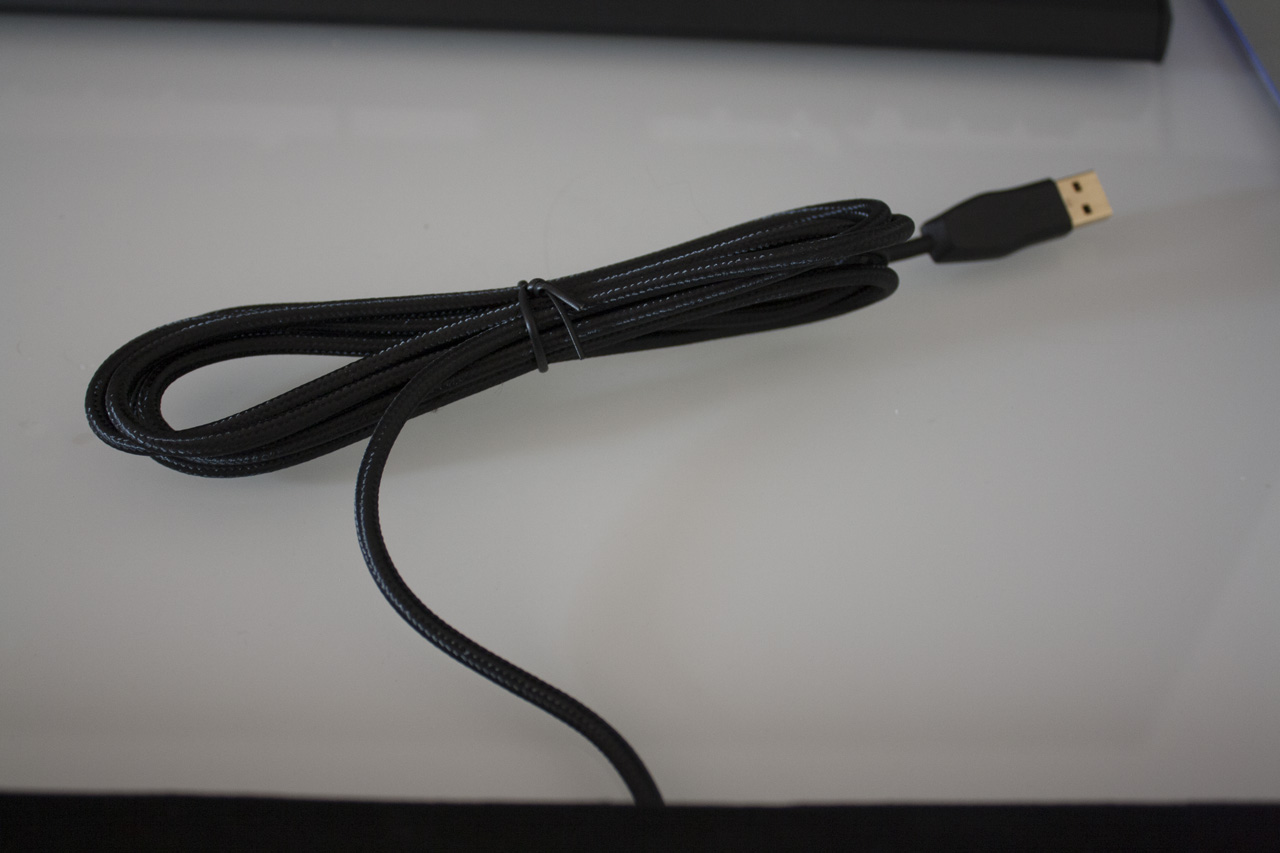
  • 2 metre textile-covered USB cable
  • 454 x 147 x 28.4 millimetres (keyboard only)
  • 1350 grams (wrist rest is 257 grams)

Unboxing

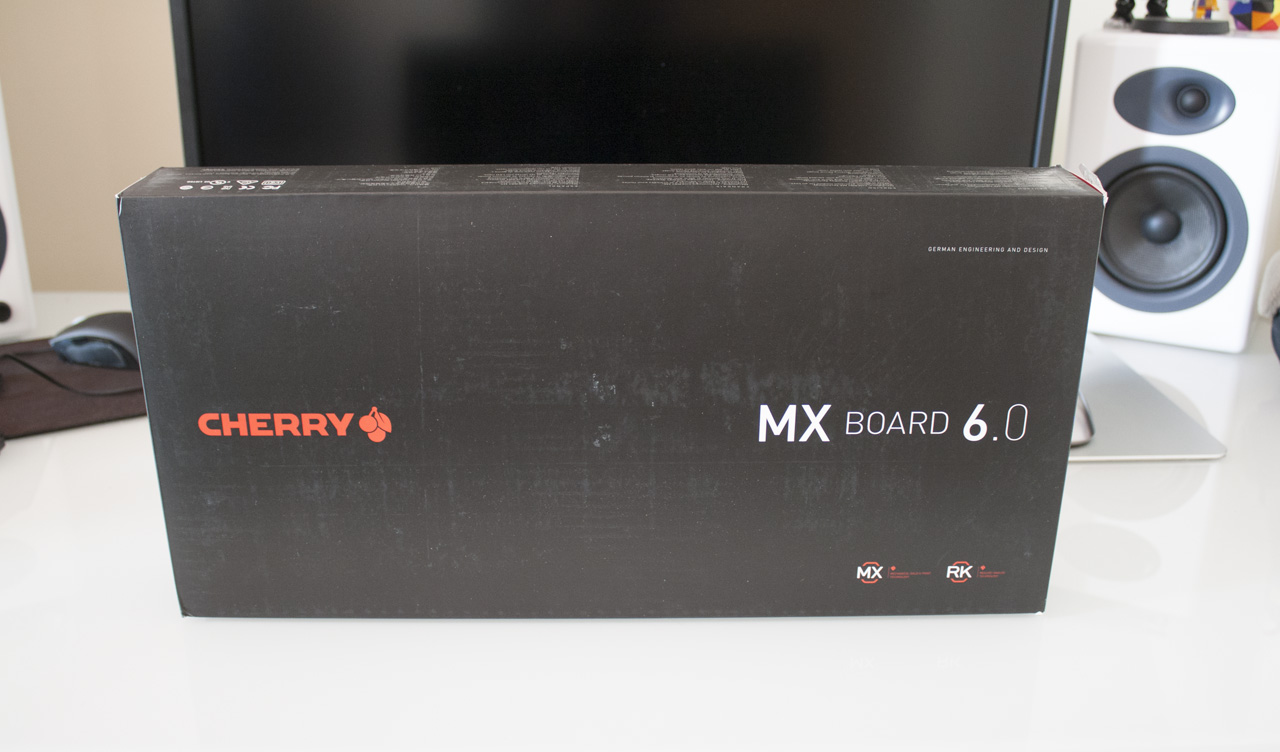
The MX Board 6.0 comes in a classy black cardboard box, with little more than Cherry’s logo and the MX Board 6.0 writing. On the back, you get the standard features and a photo of the keyboard.

IMG_4616

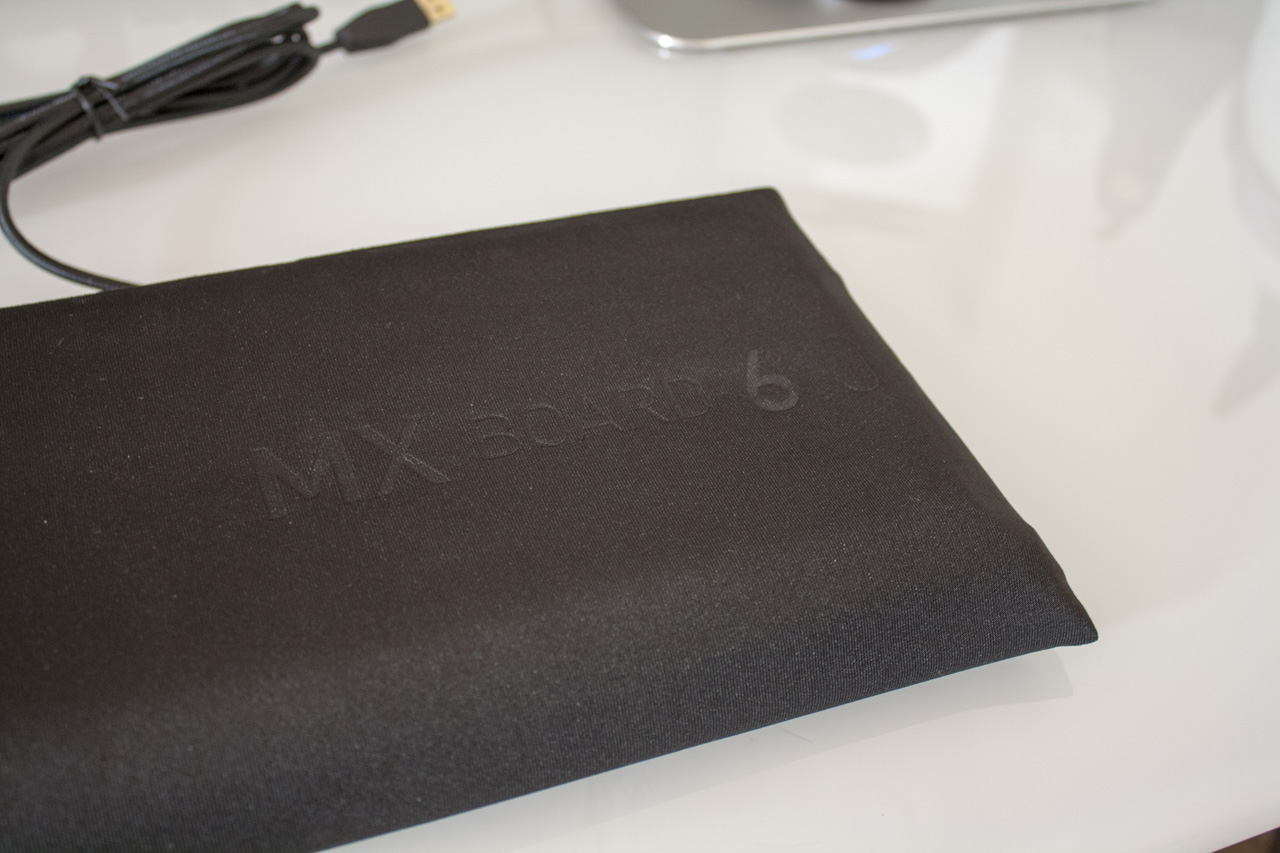
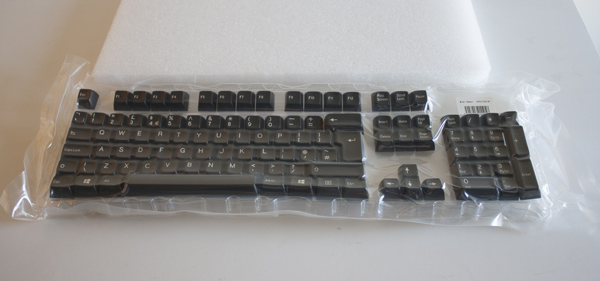
Let’s take the keyboard out of the box and discard the usual literature. The keyboard comes wrapped in this nice microfibre cloth, with the MX Board 6.0 logo imprinted upon it. Hang onto this – it’ll be great to use whenever you’re taking your keyboard to a LAN or leaving it unused for a long period of time, to prevent dust build-up.

IMG_4622

Now let’s take a look at the keyboard itself.

Design

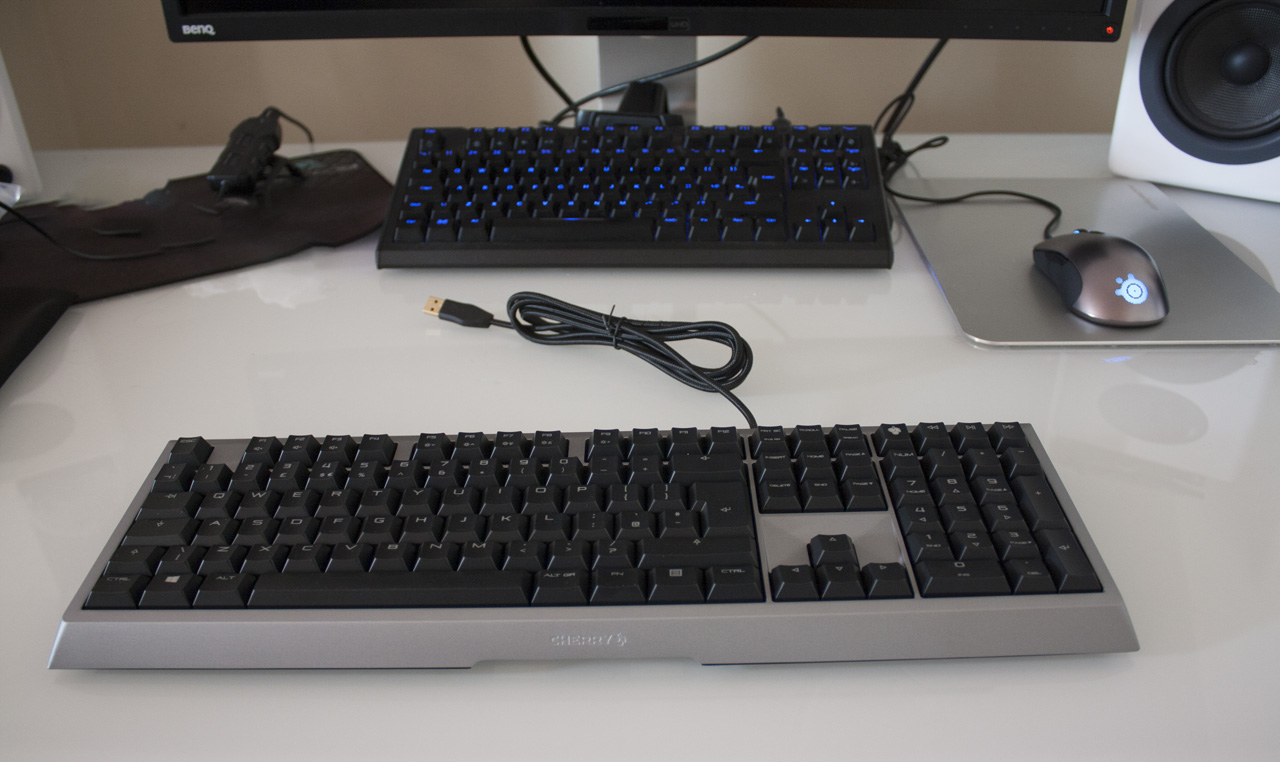
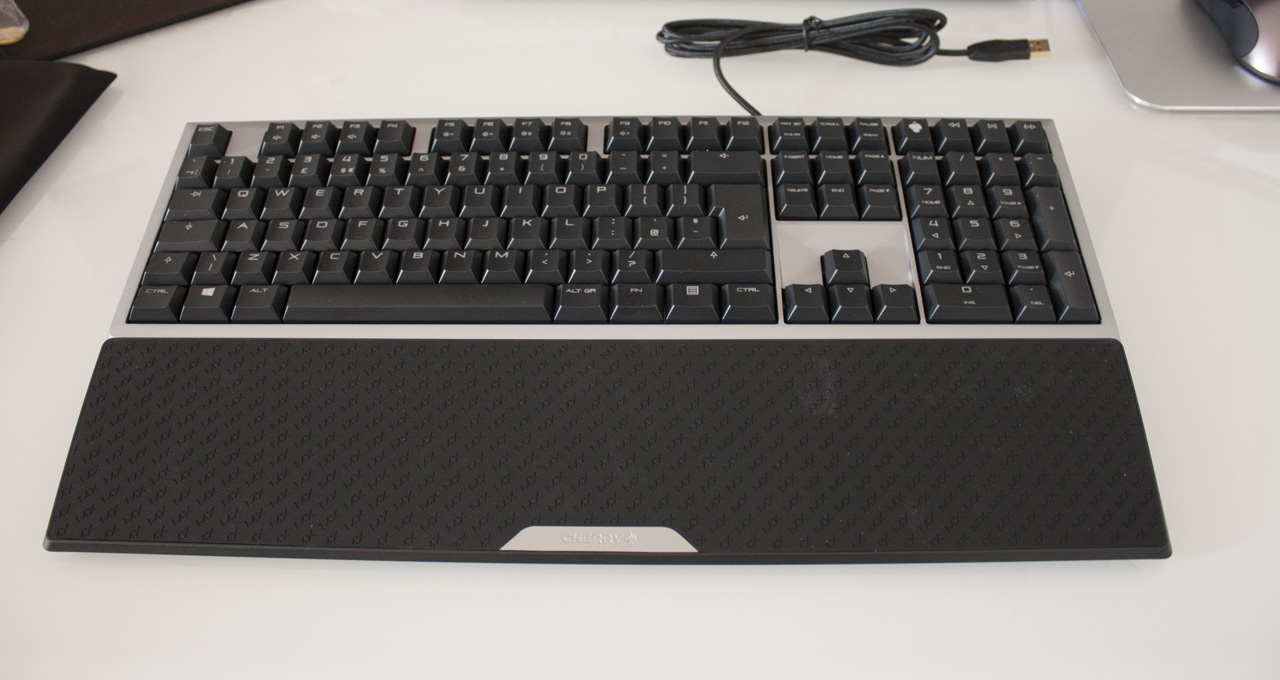
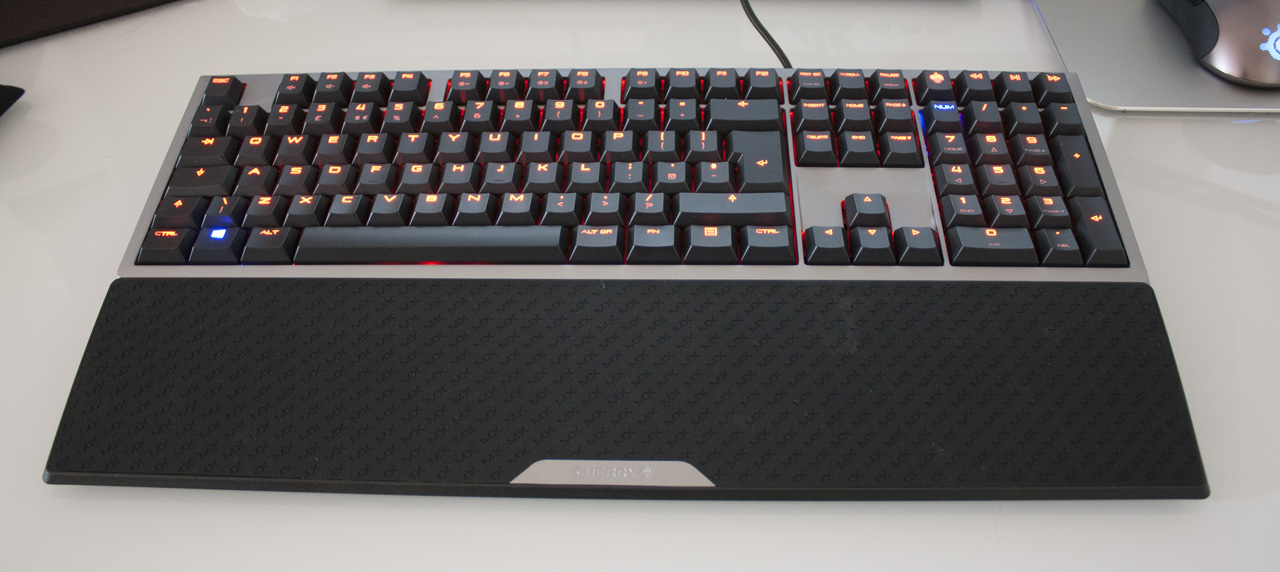
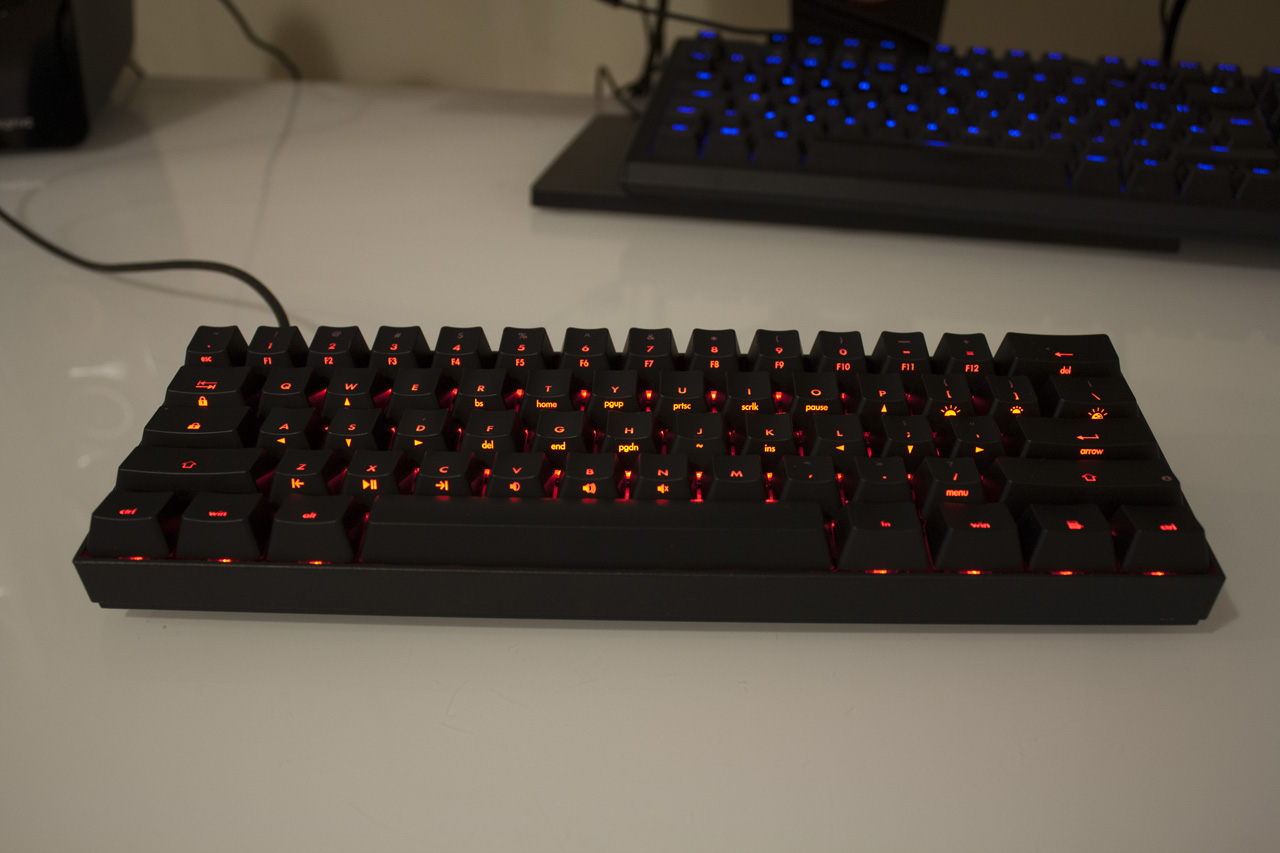
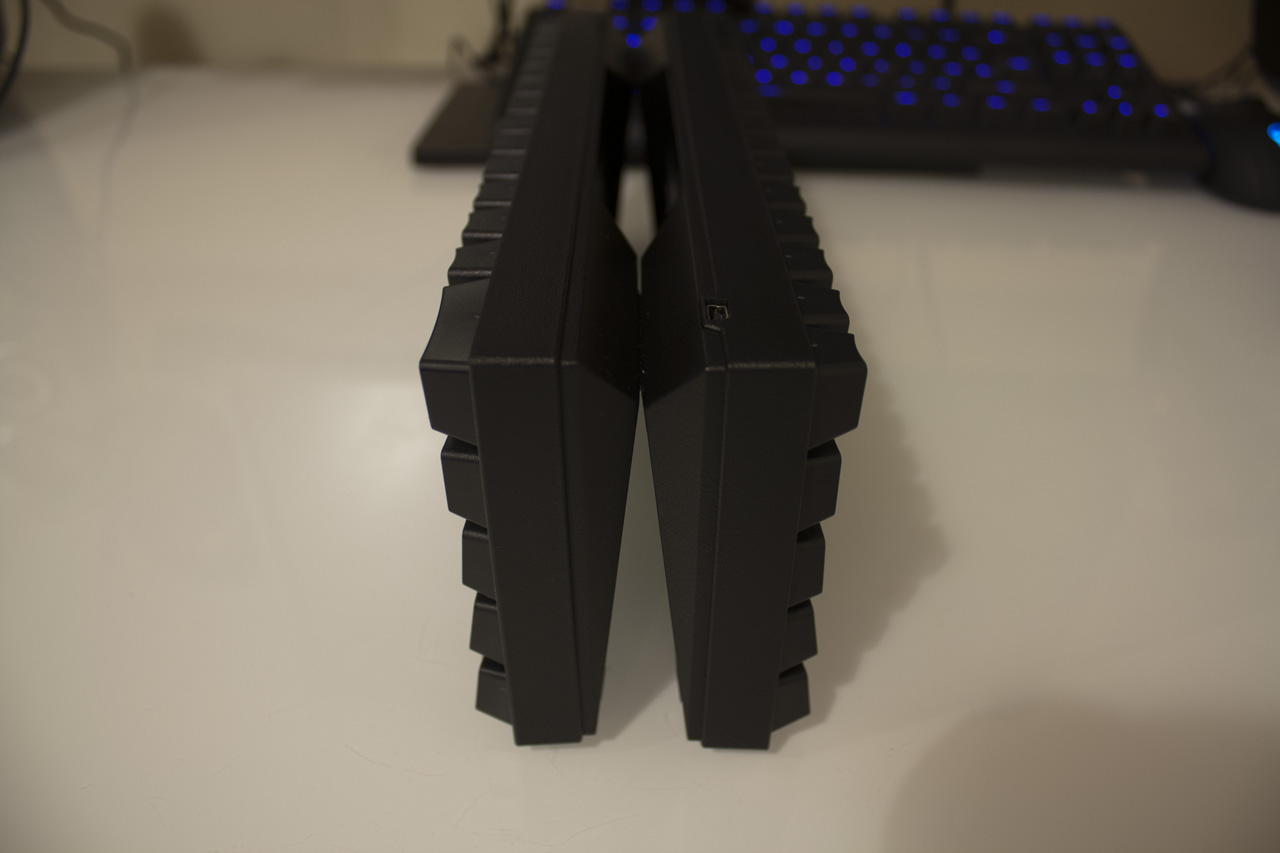
The MX Board 6.0 lives up to its premium price point with a very swanky design. Sanded aluminium is used for the upper housing, with a grease-resistant coating that should keep it in good condition for a long time. The aluminium extends down the front and half of the sides, with sloped edges that remind me of the T-34. Like that mechanical marvel, this keyboard is an impressive bit of kit – and it gets more impressive when it lights up.

IMG_4635

At the heart of this keyboard are Cherry’s own MX Red switches. With many keyboards moving to competing switches, it’s nice to feel genuine Cherry switches once again.

IMG_4666

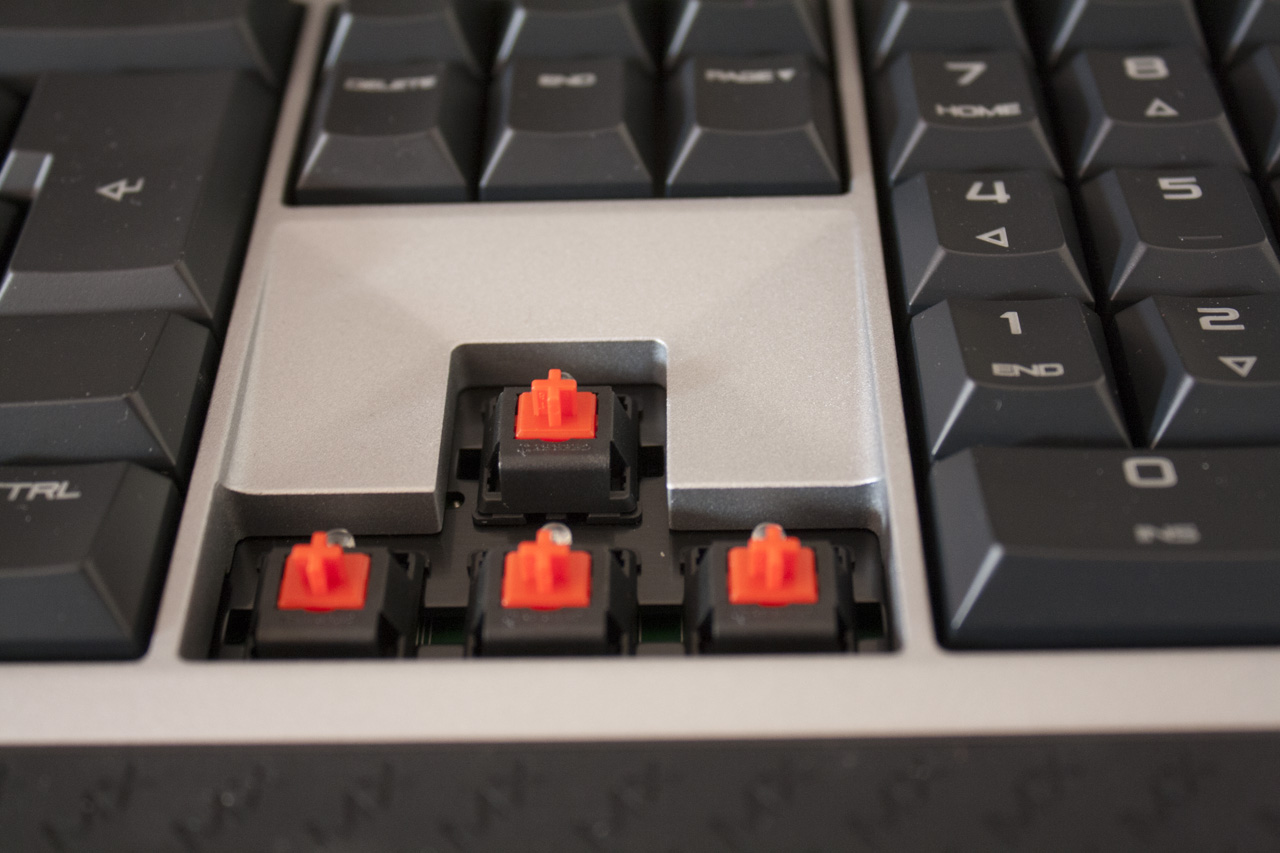
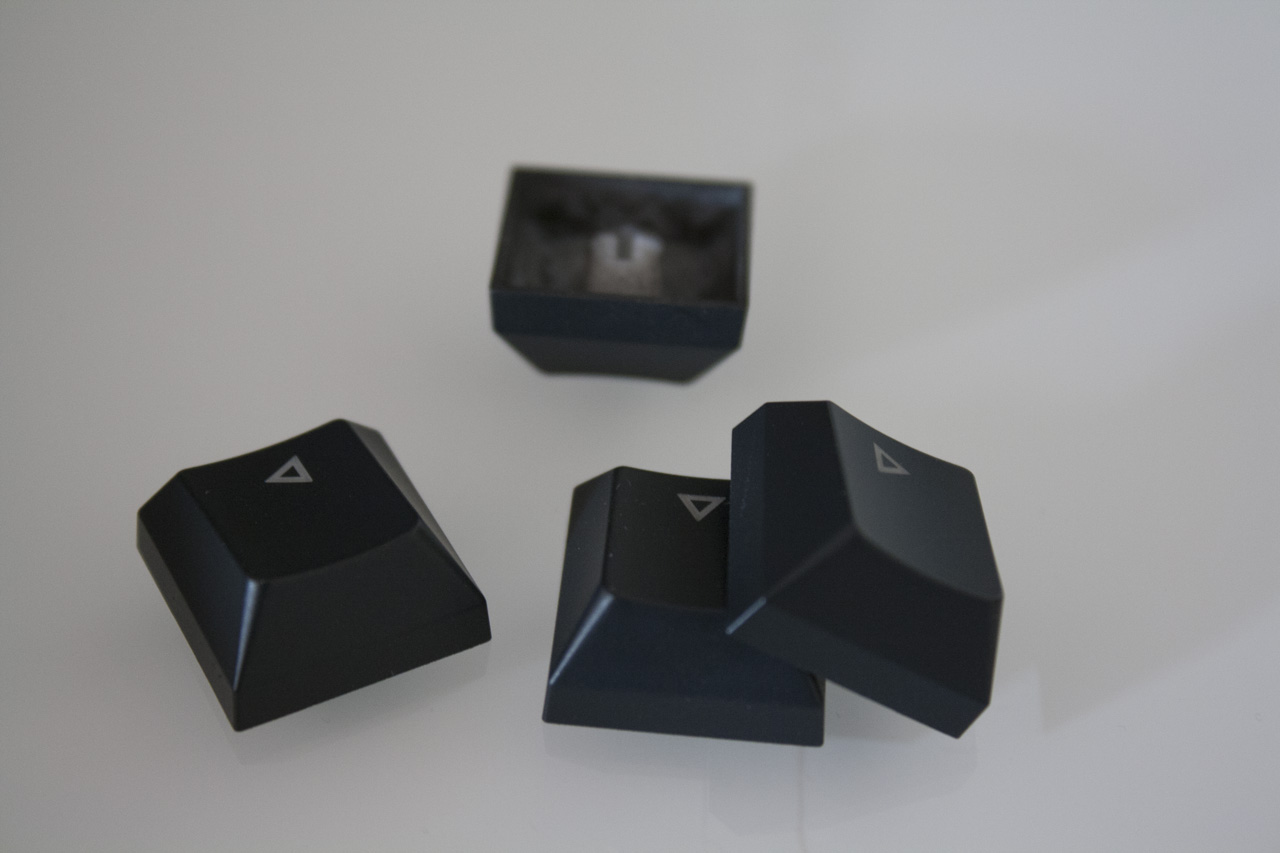
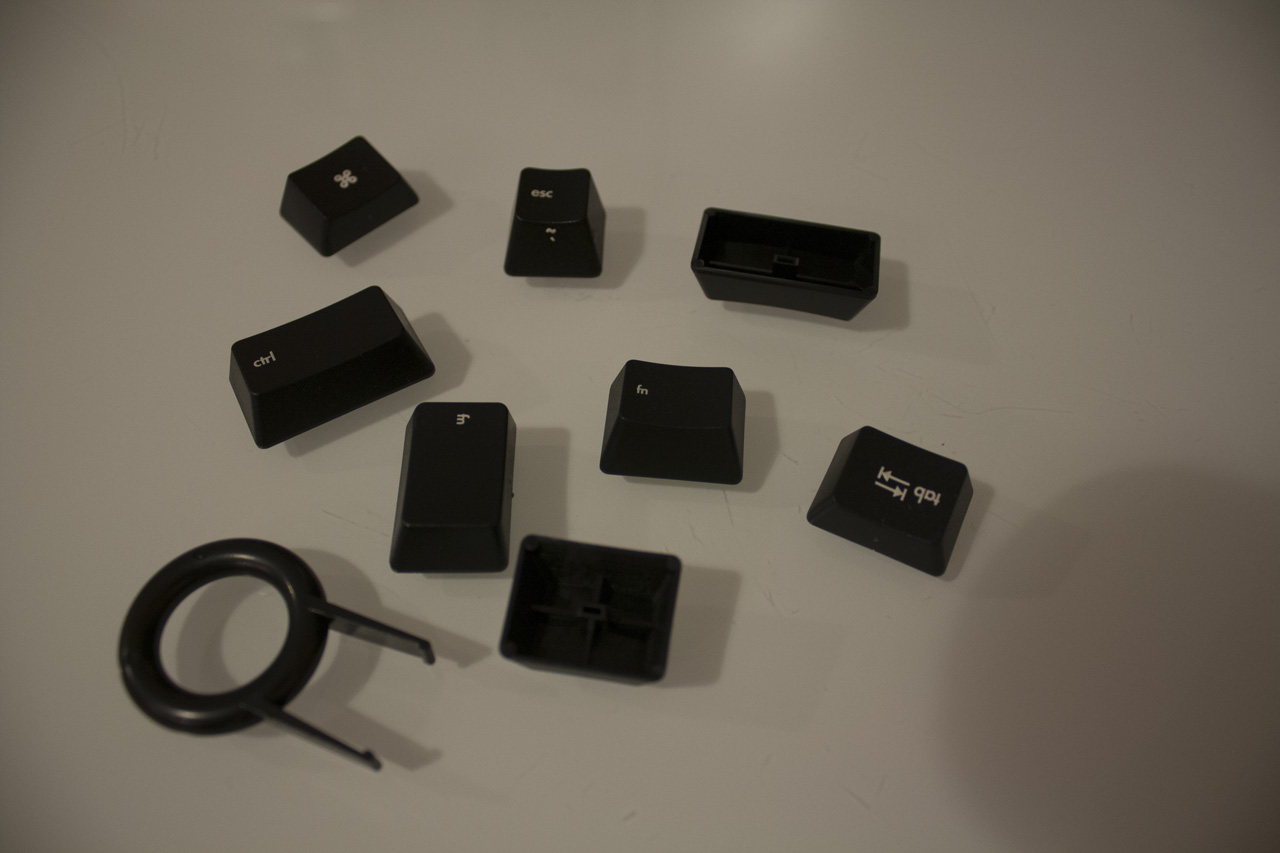
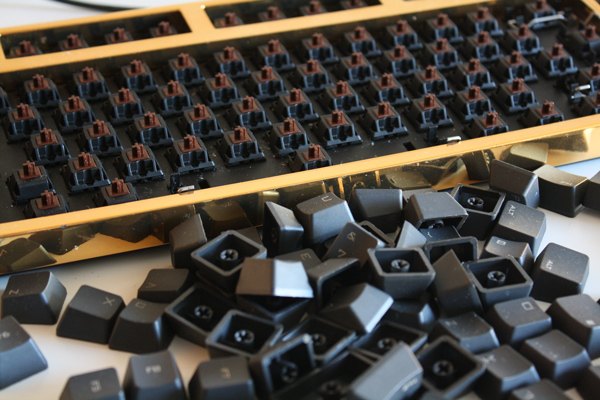
The MX Board 6.0 has fairly short ABS keycaps, lasered to allow the backlighting through.

IMG_4659

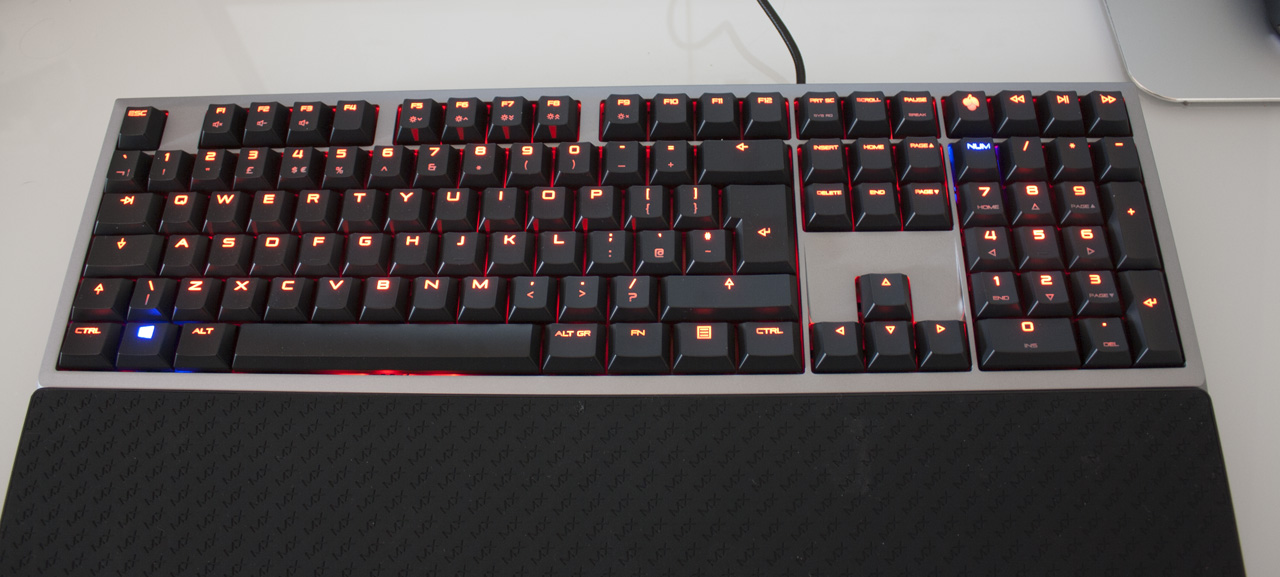
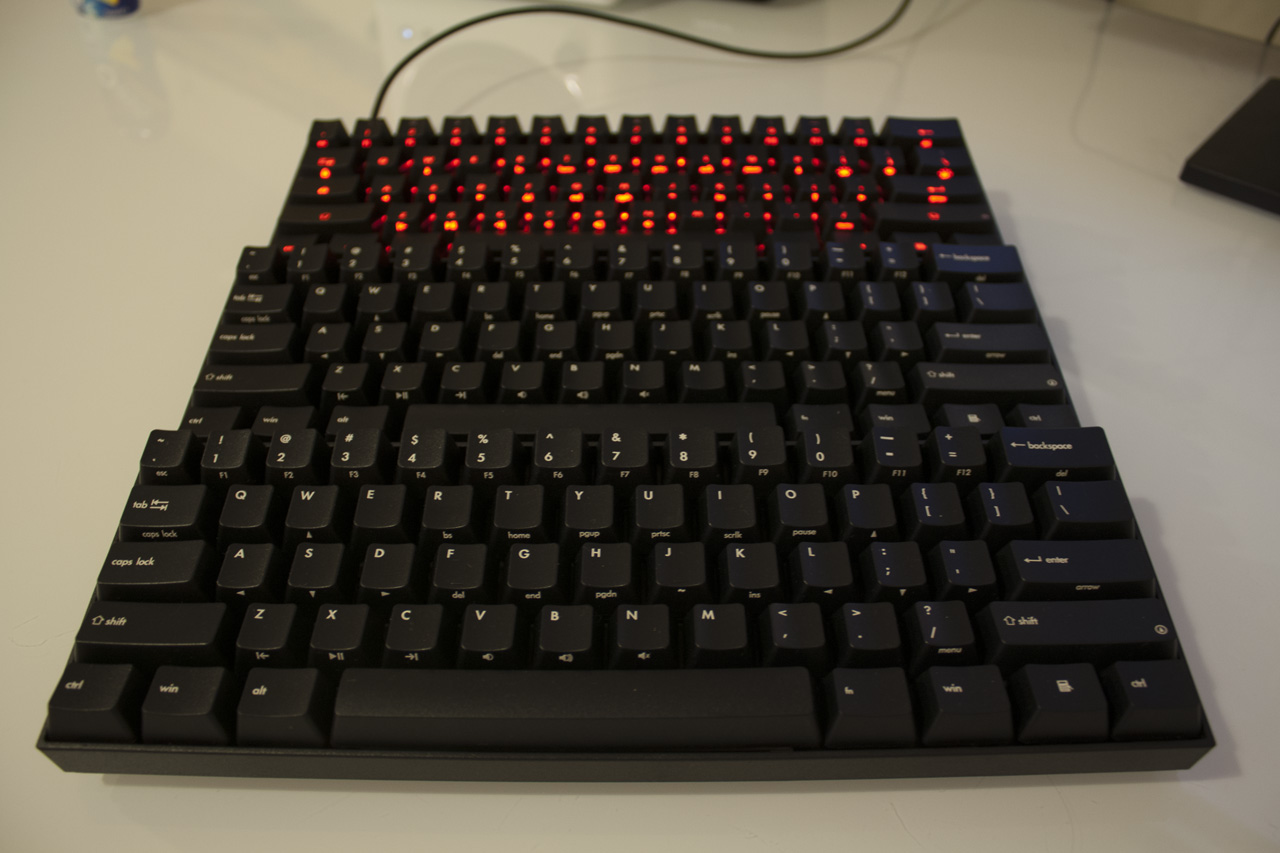
The keyboard includes red LEDs, with an unprecedented 100 levels of brightness. There are +/- 1% keys on F5 and F6, with +/- 10% keys on F7 and F8 to speed things up. There’s also an off setting, toggled with F9. The backlighting feels like a warmer red to me than other keyboards I’ve used, and I appreciate that.

IMG_4690

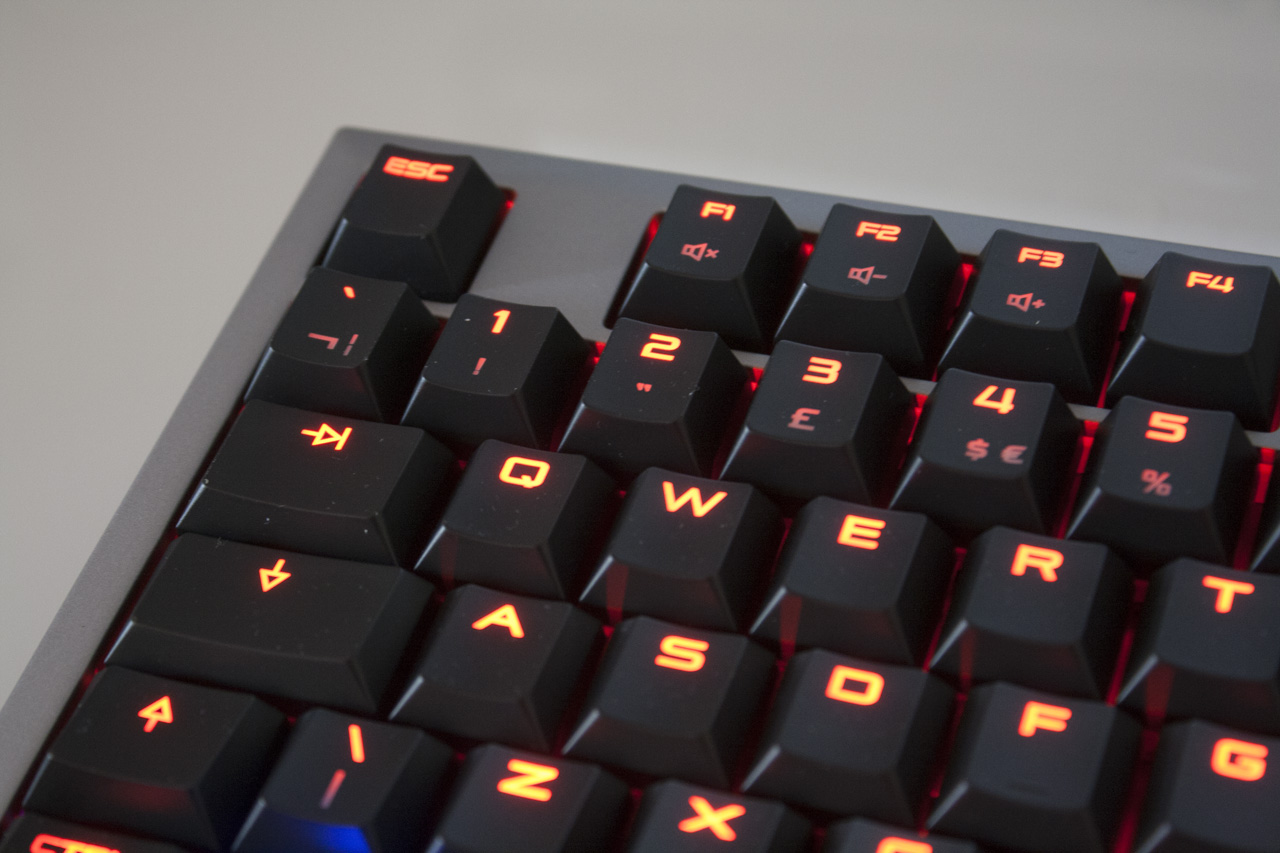
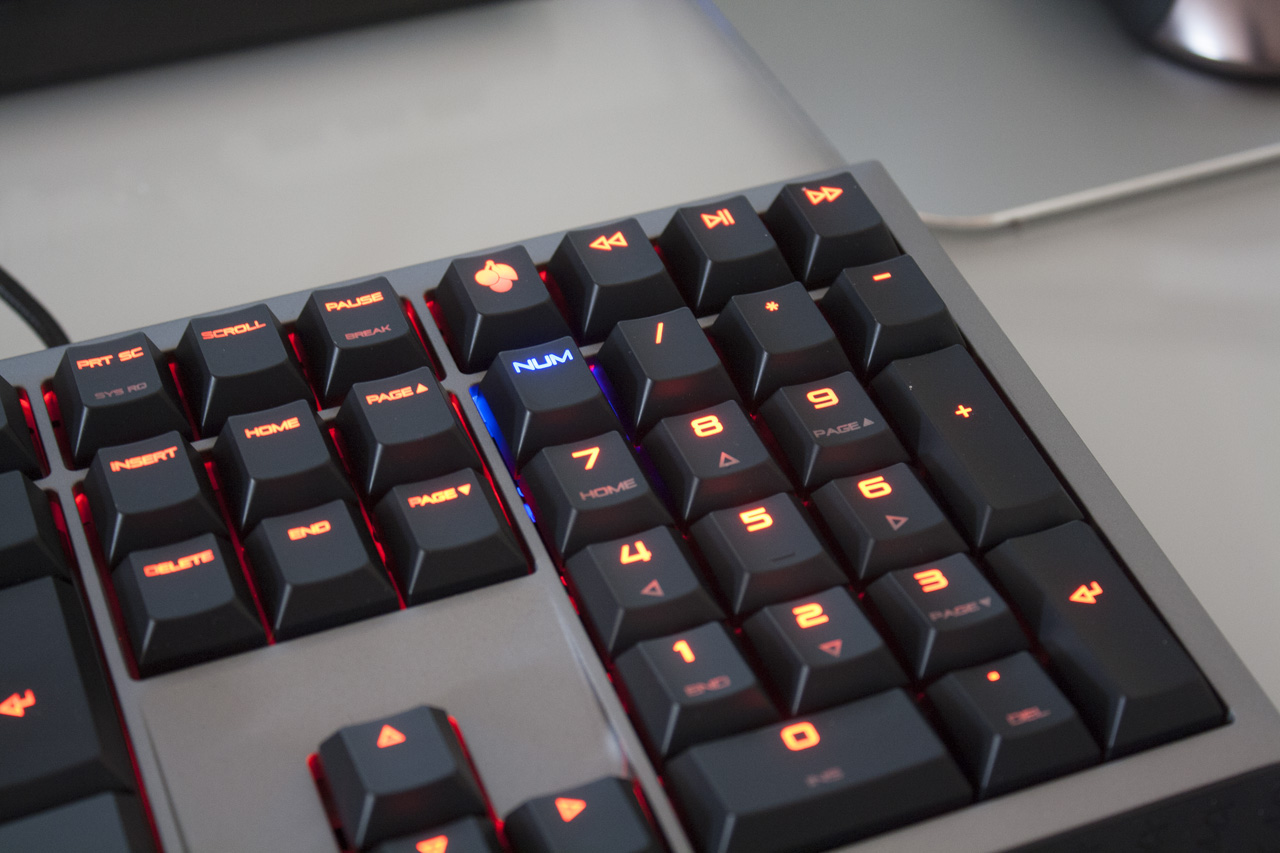
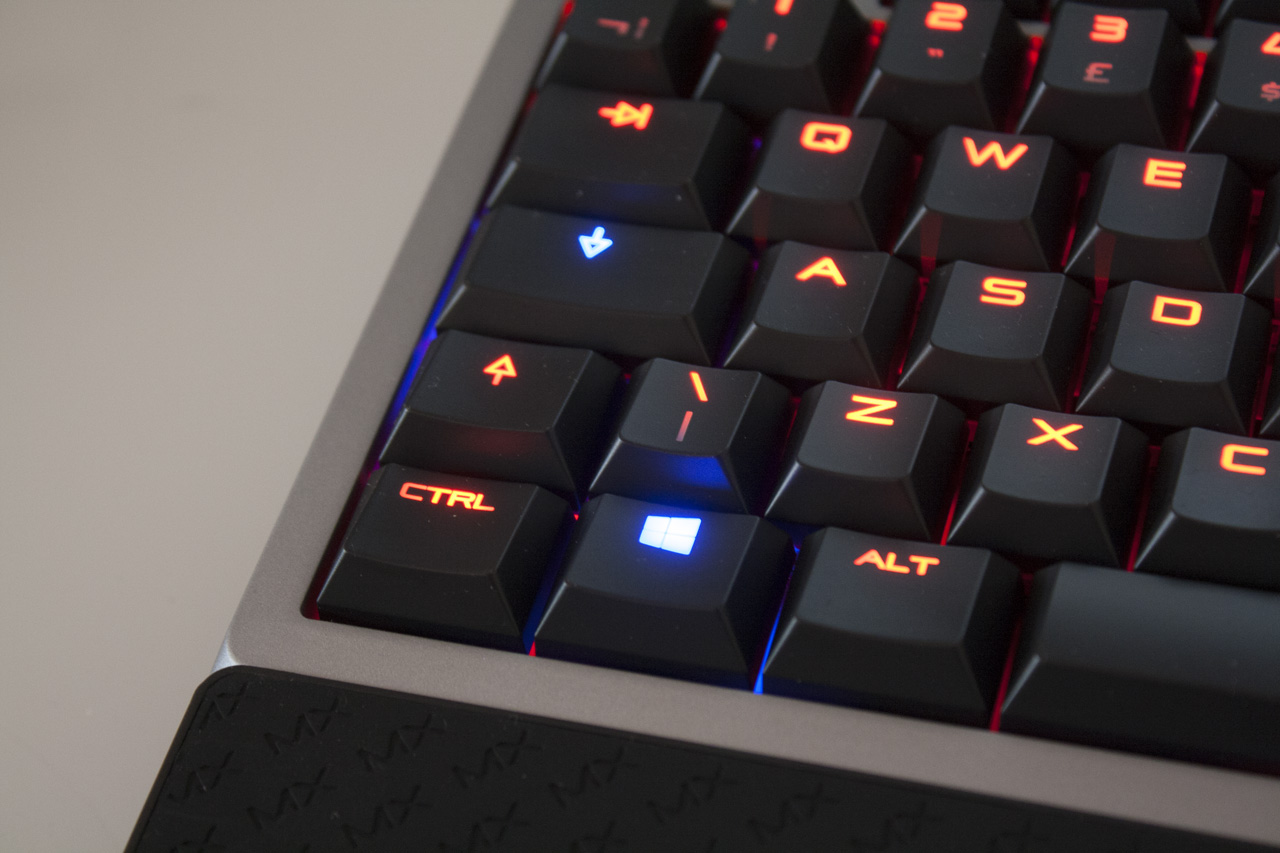
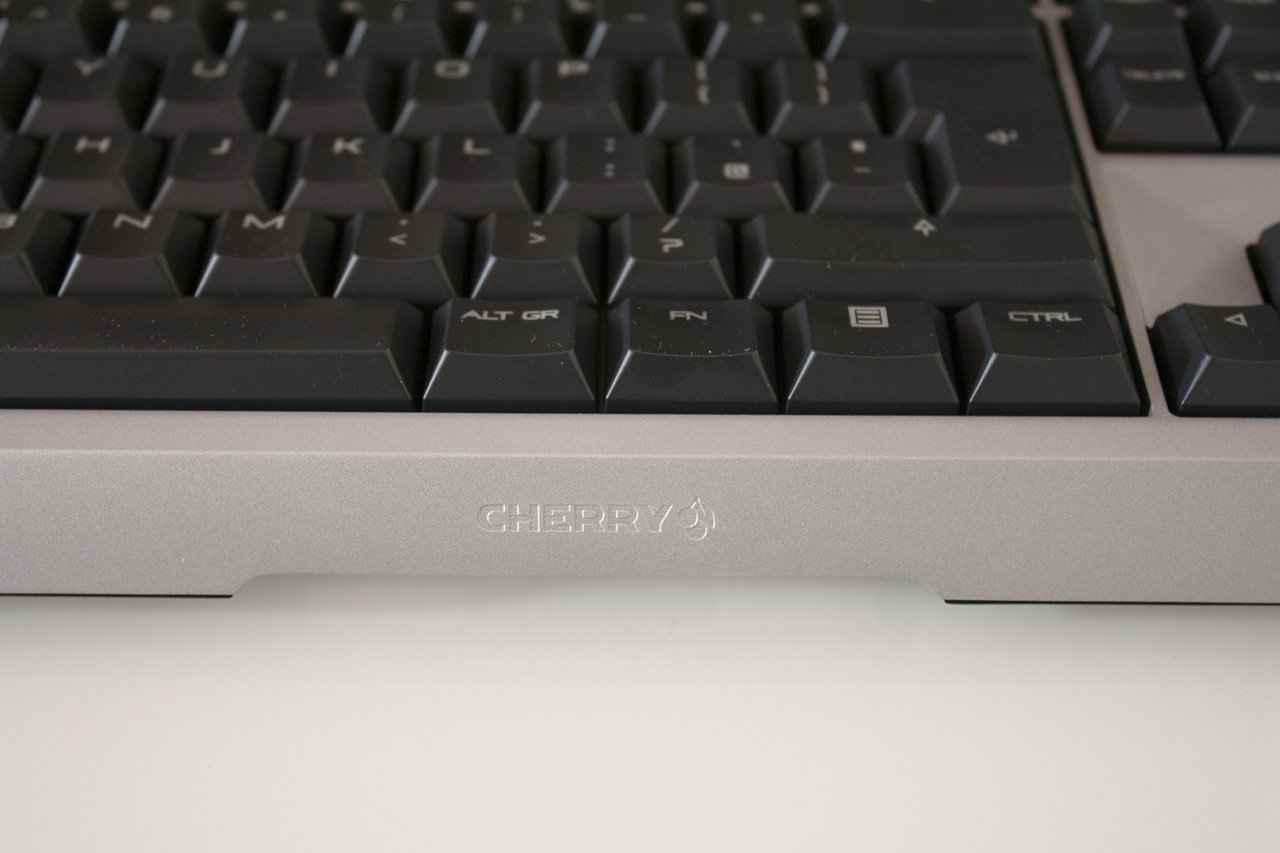
The layout is quite standard at this stage, with a few exceptions. There’s a function key in the lower section of the keyboard, which allows access to the volume and backlight controls. The upper right corner of the keyboard, where most keyboards have status LEDs, is instead filled with more keys: a Windows lock key and skip forward / play / skip back buttons. This is a useful use of this space, but it raises a question – how does the keyboard signal that Caps Lock is on?

IMG_4638

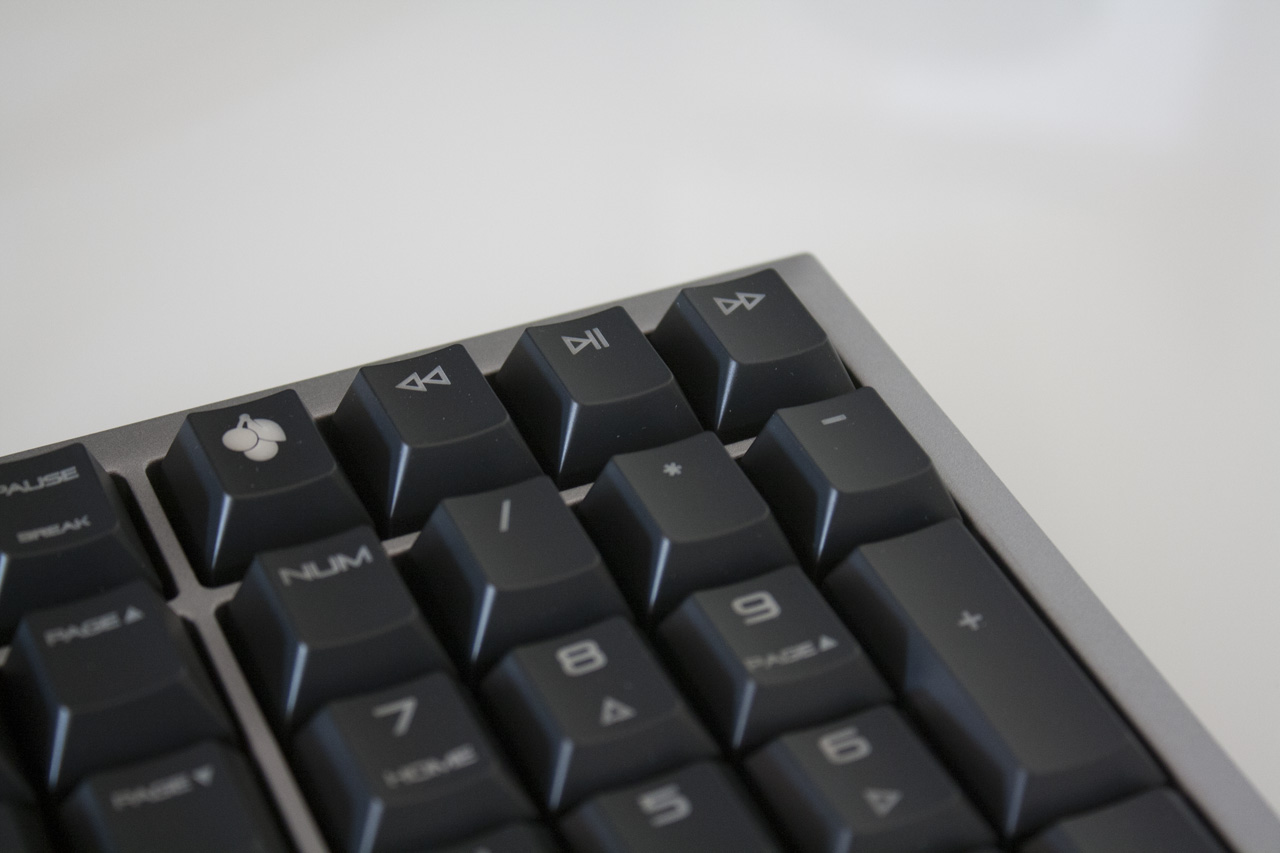
The MX Board 6.0 actually includes dual-colour LEDs for Caps Lock, Scroll Lock and Num Lock, plus Windows and the Win Lock key. That means these keys can glow blue instead of red when that particular function is active. Note that the backlight controls don’t affect these keys, so they will always be on quite a bright setting.

IMG_4693

The keyboard also comes with a rubber wrist rest.

IMG_4651

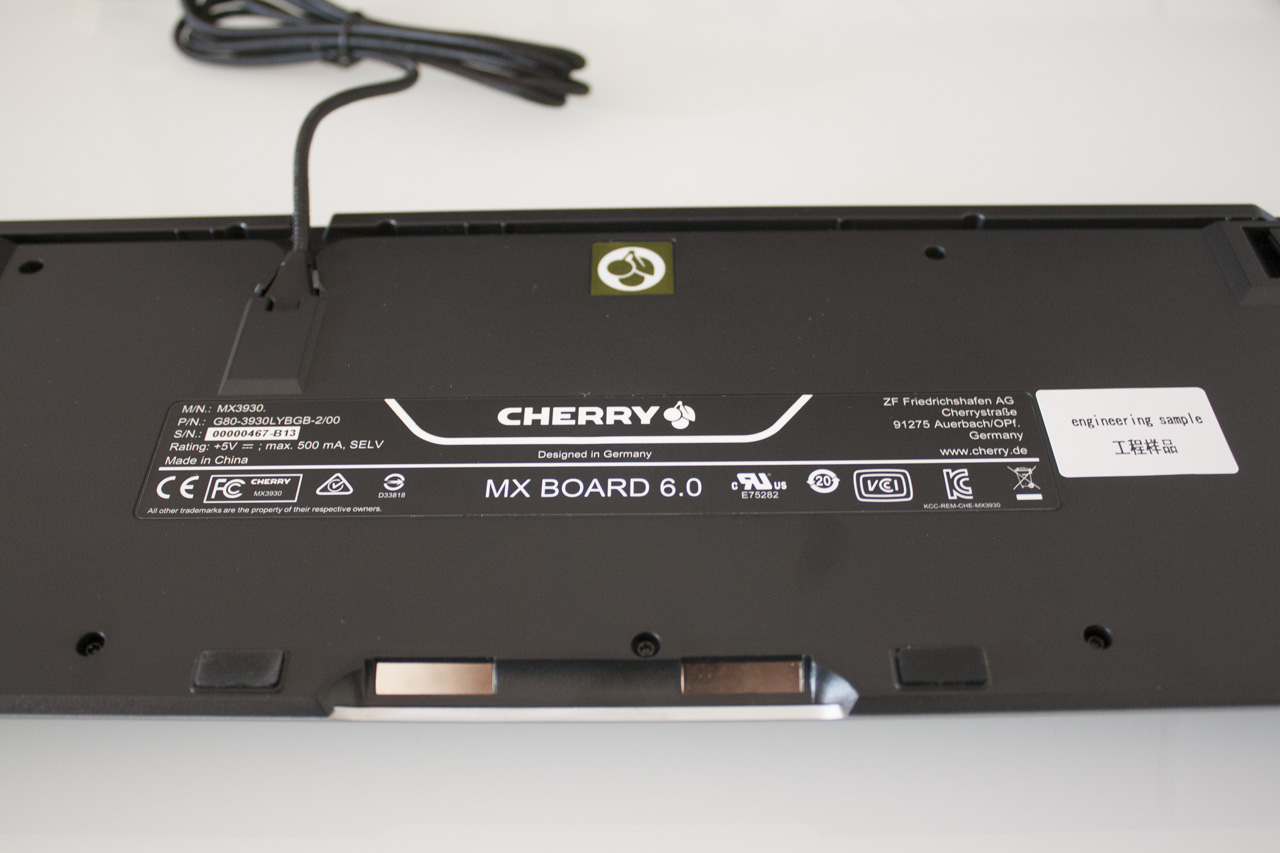
Turn over the keyboard, and you have the standard arrangement of rubber feet and a pair of flip-out plastic feet for getting a bit of tilt on. The keyboard also includes a magnetic connector for the wrist rest, making it easy to add or remove the rest as needed.

IMG_4641

Finally, the cable. This is a usual braided cable, ending in a gold connector. You have two metres to play with, which should be suitable for most all situations. The cable initially looks like it might be removable, but it is not – don’t tug on it!

IMG_4621

Impressions

Typing on the Cherry MX Board 6.0 feels great, with the light Red switches providing a calming report and just enough feedback to make high speed typing easy. While the keys are a little more tightly spaced than the average full-size keyboard, this kept the keyboard’s footprint at a manageable level and never caused issues. The low-profile ABS keycaps themselves are nice, with a very clear font used and no typographic oddities to be found. I’ve always been surprised that there are so few low-profile mechanical keyboards, so the MX Board 6.0 is a solid addition to that small pool.

IMG_4683

The wrist rest was another good inclusion, making typing for long periods more comfortable. The rubber coating feels a little sticky and is hard to clean, but it does look good if you can keep it spick and span.

The media keys were also quite useful, particularly the skip and pause keys in the upper right. Usually these are hidden in a function layer, so it was great to be able to hit just one key and get an instant result.

IMG_4630

The unique feature of this keyboard is the RealKey signal processing, an analogue system which Cherry hold reduces key input lag from 20ms to just 1ms. This sounds great, but ultimately it’s impossible to tell the difference between the MX Board 6.0 and another keyboard that lacks this technology. When the average human can only react to something in 200ms, reducing input lag by 19ms is largely irrelevant. I’d welcome a blind trial of the technology to prove its efficacy.

The red LEDs used on the MX Board 6.0 – and the 100 levels of brightness – are impressive and work well, ensuring you’ll always find a suitable level. I like the colour of these too, which seems a little warmer than most red LEDs I’ve seen.

It is vexing to see that the bright blue status LEDs cannot be turned down though. I never engage Windows lock as I use the key frequently, so I had to just deal with a very bright LED behind a large symbol, which was capable of leaving an after-image in my eye late at night. Not cool, Cherry.

IMG_4688

Conclusion

The MX Board 6.0 is a bold keyboard, with a stylish metal design, dependable Cherry switches and a few cool features. It’s hard to tell the impact of the RealKey analogue signal processing that Cherry have been so proud of, but the keyboard feels responsive and handles NKRO with ease. While there are a few niggling factors to be aware of, this is a solid premium keyboard and it’s definitely worth a try.

The MX Board 6.0 is available now at Keyboard Co right here.

Pros

  • Cherry MX switches feel as great as ever
  • Incredible range and precision for backlighting
  • Aluminium chassis provides a feeling of definite quality

Cons

  • Rubber-coated wrist rest picks up debris quickly and is sticky in hot weather
  • Blue status LEDs (Win / Num / Scroll) cannot be dimmed, clash with red LEDs
  • RealKey analogue signal processing is impossible to distinguish

 Link

Thanks for checking out the article. Be sure to let us know what you think in the comments below!

Posted in Articles Tagged with: , ,

KBP V60 Mini review (MX Clear, Matias Quiet Click & Matias Click)

IMG_6038

We recently added a trio of 60% size compact mechanical keyboards to our shelves. These are the KB Paradise V60 Minis, available with three different switches in the USA layout. You have a choice of the rare Cherry MX Clears, stealthy Matias Quiet Click or retro Matias Click switches. I was lucky enough to be able to try all three, so here are my impressions!

Features

  • 60% size keyboard (289 x 100 x 42mm, 800g)
  • Cherry MX Clear, Matias Quiet Click or Matias Click switches
  • N-Key rollover, plug ‘n play, upgradeable firmware
  • Blue or Red LED backlighting (on MX Clear model)
  • DIP switches, keycaps and key puller for custom layouts
  • Detachable Mini USB cable

Design

IMG_6085

The KB Paradise V60 is a simple but attractive compact keyboard, one that drew a cute chorus of ‘aww!’ when it was pulled from its equally tiny cardboard box. It measures a little under 30 centimetres across, 10 centimetres down and 4 centimetres deep.

IMG_6089

IMG_6067

Compared to a normal keyboard, there are no dedicated F keys (F1 – F12), arrow keys or navigation keys (Ins/Del/etc). Instead, these are accessible via a Fn layer; the top row becomes the F keys, arrow keys are on “WASD” and the navigation keys are on the right side of the keyboard. The Fn layer also contains media keys, allowing you to adjust the volume or change tracks. The manual provided (JPG) with the keyboard has a full list of the various Fn key combinations, and these are also printed on the keys themselves.

IMG_6093

Apart from the keyboard and manual, you’ll also get a Mini USB cable, a key puller, and a selection of alternate keycaps.

IMG_6077

The keyboard has six DIP switches on the bottom right side, allowing you to swap the position of various modifier keys like Fn, Ctrl, Win, Alt, Tab and more. You can use these to mimic that of native Mac or *nix keyboard layouts and more easily access the Fn layer.

IMG_6100

The bottom of the keyboard also has some rubbery feet which anchor it very well to the desk, given its size.

Switch comparison

The first keyboard I tried was the MX Clear version, as it was my first encounter with the switch. The MX Clear switch is essentially a more forceful MX Brown, a tactile switch that actuates at around 55 cN of force compared to 45 cN on the Brown. The real advantage of these switches is that they make it harder to bottom out, allowing you to adopt a less tiring and more efficient typing style. While it takes more force to press down, the switches also return to their original position faster. It’s an interesting feeling for sure, and one that I’d definitely recommend as a trial for anyone that is a fan of the more common Brown switches. The dual-colour backlighting of the MX Clear model also looked awesome, and definitely proved its worth during late night writing.

IMG_6098

While I’ve used the Matias Click and Quiet Click on Matias’ own keyboards, this was the first time I’d used them on a 60% size keyboard. I found their inclusion to be absolutely excellent, with the same feeling of tactile response as Matias’ own keyboards. The Quiet Click switches were dutifully quiet and worked well for working in public, while the Click switches were brilliant for clacking loudly and proudly at home. Given the portable nature of the V60 I think the Quiet Click switches make the most sense, but all three are viable options.

Overall impressions

The keyboards themselves were very fun to use, not even considering the relatively uncommon switches inside each. The keyboards worked great for games, providing plenty of space for the mouse and its mat, and the backlighting of the MX Clear model was useful too. The V60 was a little less ideal for programming and writing, thanks to the movement of the cursor keys to the Fn layer. (This is why Matias are making their own 60% that does include arrow keys in the right place!)

IMG_6046

The DIP switches allowed me to get another Fn key on the never-used Caps Lock, and that made accessing the arrow keys and media controls much easier. The other keys – F1 to F12 and the navigation cluster – were used less frequently and I didn’t mind their move to the Fn layer. When moving to a Mac, I also appreciated the rapid switch to Mac-style modifiers with just the flick of a switch.

IMG_6049

The small size and low weight of the V60 Minis made them easily portable, and excellent companions to tablets or even smartphones via a USB OTG cable. The keyboard was also great for LAN parties, taking up minimal space and weight in my bag yet delivering all of the keys necessary for games like Counter-Strike, Civilization V and Rocket League. The choice of Red or Blue backlighting on the MX version was also a useful addition for late-night gaming.

IMG_6083

If you’re looking for a low-cost keyboard for taking with you to work – or on holiday! – the the V60 Mini is an awesome choice that provides all of the fun of a full-size mechanical keyboard but in a much more portable package. Heavy writers or number crunchers will probably want a TKL or full-size keyboard as their primary, but as a cute secondary the V60 is so much fun.

Links

IMG_6106

Conclusion

Thanks for checking out the article. Be sure to let us know what you think on the comments below, or contact us on Twitter or Facebook!

Posted in Articles, Reviews Tagged with: , , , , , ,

Matias update: linear switches & 60% size keyboard

Matias are well known for their classic Mac-style keyboards, but they’re also innovators – Edgar Matias made his name with a one-handed keyboard, and recently the company developed a Quiet Click switch that has been used to great effect in its recent keyboards. It’s no surprise then, that Matias have a few more projects in the works. Today we’re going to introduce two:  their redesigned linear switch and a 60% size keyboard.

Matias Quiet Linear switches

Matias linear switches were developed for the Open Stenography project as an improvement over Cherry’s Red and Black linear switches.

KS102Q - Matias Quiet Linear Key Switch ModuleThey boast a smoother and more stable feel thanks to an internal leaf spring that tries to keep resistance at the same level throughout a key press. They’re also quieter than Cherry switches (and even quieter than Matias’ Quiet Click switches), making them ideal for office use or late night gaming. Finally, the switch housing is transparent, making them compatible with (RGB) backlighting.
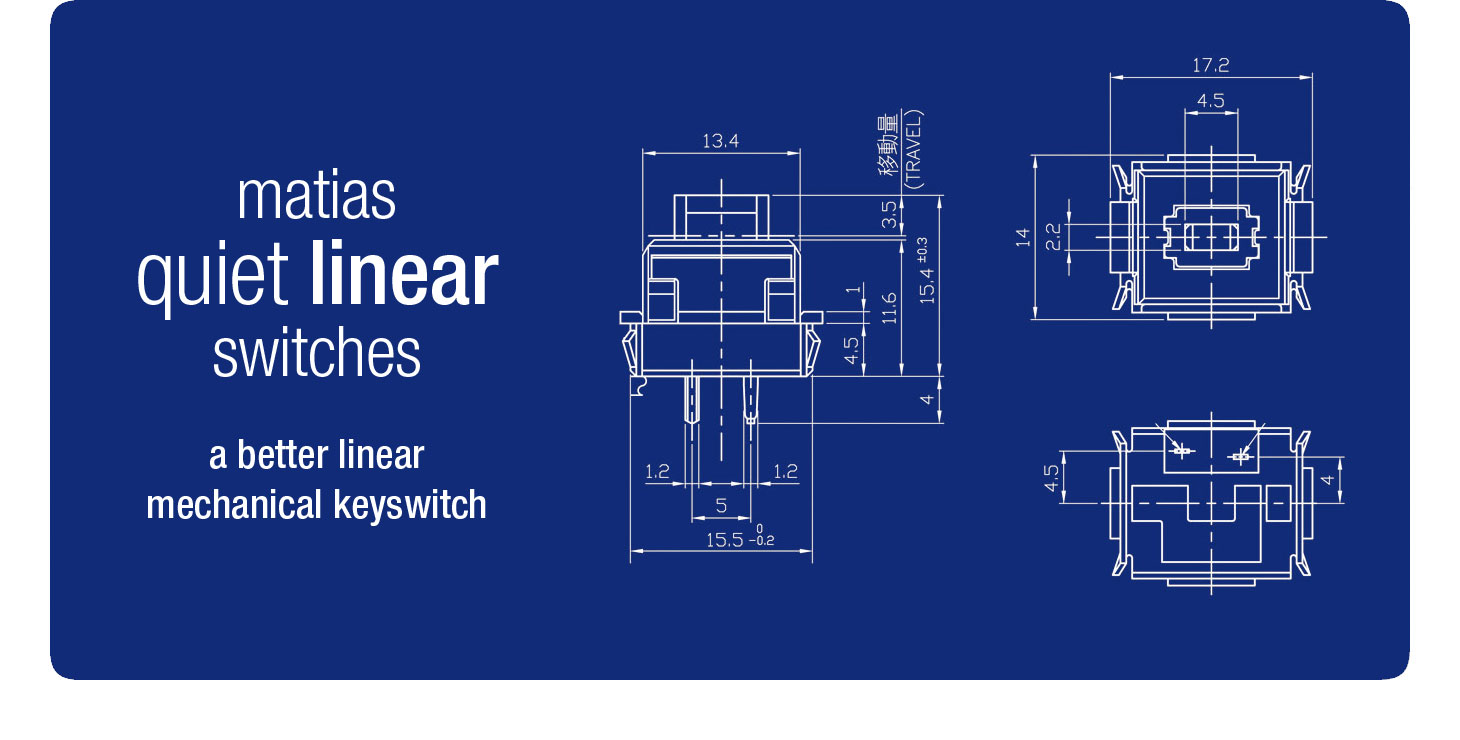
Of course, the new switches also have the traditional advantages of Matias mechanical switches. That includes N-Key Rollover (NKRO) so you can press as many keys down as you like and have them all register correctly, and a rated lifespan of 50 million presses.

We’re stocking the switches, and you can purchase as many as you’d like right here if you’d like to include them in a custom keyboard (or replace the switches in your existing keyboard). The switches are also available from Matias themselves for North American customers.

Matias Quiet Linear Switches - click for larger images

Of course, you might think – hey! I want to try these new switches in an actual keyboard that I can just buy. And that’s totally valid – so have a look at Matias’ 60% size keyboard, which will include the new soft linear switches.

Why linear switches? Well, clicky or tactile switches are great for pressing a large amount of different keys thanks to their aural and tactile feedback; it’s no surprise that they tend to be slightly favoured for writing and RTS games. For other games like FPS though, where you’re pressing a small number of keys repeatedly, then the softer, smoother action of a linear switch can be better.

Choosing a switch is a very personal experience of course, so we encourage you to try the different options available to you rather than feel there’s only one viable option for your activity of choice! Read more about different Cherry MX switches here; we’ll have a guide to different Matias switches up soon.

Matias 60% keyboard

For years, fans have been asking for a more compact Matias keyboard. Matias heard their cries and started work on their simply titled 60% keyboard – a keyboard that is about 60% the size of a normal full keyboard.

This portable option frees up space on your desk, is better for traveling with and lets you move your mouse into a more comfortable position. Lots of people use keyboards of this size with tablets or laptops, as they’re small enough to sit below the display and don’t add too much to your baggage.

The Matias 60% is even thinner and smaller than a TKL (tenkeyless) keyboard, as it omits the Function row and the numberpad. In addition, everything that normally sits to the right of the Enter key (the arrow keys and the navigation cluster) have been moved into the bottom right of the keyboard, where the secondary modifiers (Right Alt, Right Ctrl, etc.) usually sit. The result is what Matias call “the power of a full keyboard in the smallest usable size.”

Matias 60% Keyboard - click for larger images

Matias are even offering two different versions for Windows and Mac users. Windows users get the navigation cluster and arrow keys, while Mac users get Option and Fn plus arrow keys. You can see the Windows layout on the left and the Mac layout on the right. Best of all, you can change between Windows and Mac layouts with a DIP switch setting, so you can easily use the keyboard with both operating systems.

Nav Key Cluster    Arrow Key Cluster

There’s a Group Buy going on right now for the Matias 60%, so if you want to be one of the first to get your hands on one then head over to the 60% page on Matias’ site. There’s a choice of Matias Click, Quiet Click and the new Quiet Linear switches – or you might prefer to buy one without switches, and add in your own Matias or Cherry MX switches. Finally, you can even choose to buy a Matias 60% with a unibody aluminium shell, adding a little weight but providing better durability and an awesome look.

Black and Aluminum Cases

If you’d prefer to wait and see how they turn out, then you’ll be able to buy one from us once everything is finished. We’ll update our blog once we have a confirmed date for this, which should be quite some time in the future.

Conclusion

So there we have it – two cool new efforts from Matias.

It’s important to note that both projects are still in their early stages, so this information can (and probably will) change. We’ll take a closer look at these projects as they progress.

We welcome your feedback as always, and we’ll forward on any particularly interesting comments or questions to Matias themselves. Thanks for reading our Matias update!

Posted in Articles, News Tagged with: , , , , , , ,

Cleankeys CK3-17 medical keyboard hands-on review

IMG_6081-e1413797090980

The Cleankeys CK3-17 is a glass keyboard, designed for industrial and medical settings where keeping equipment clean is essential. Here’s our hands-on review.

Features & software

The keyboard is coated with Gorilla Glass, you can clean the keyboard as you would any other piece of glass – with a cloth and a suitable spray of cleaning solution. This is faster and easier than washing a keyboard in a dishwasher or with cotton swabs, and because it’s a flat, uniform surface there’s no place for germs to hide. The keyboard can also be cleaned while it’s plugged in, saving further time.

204_20141002-_MG_0453_Hygienekonzept_web

Note: The model shown in this photo is the CK3-15 wireless version, which also adds a unique integrated touchpad. Please see the CK3-15 product page for more information.

The Cleankeys comes with special CleanSweep software, which monitors the cleanliness of the keyboard. You’ll set a policy for regular cleaning, and the software will enforce that policy through reminders. The software is surprisingly precise, showing you how much of the keyboard you’ve cleaned in real time. That ensures that you never miss a spot, and the Cleankeys will become clean and sterile every time.

Screenshot 2014-11-24 04.17.56

Whoops, looks like I missed a few spots

The Cleankeys works out of the box with no software required, and runs happily on Windows, Mac and Linux. Sensitivity and volume control keys allow you to change these settings on the fly, while a Pause key lets you clean the keyboard without activating any keys. If you do decide you want to install some software, you’ll be able to implement cleaning regimes, use the TouchTap software and monitor the cleanliness of the keyboard.

Physical Features

IMG_6520+1-e1413797054554

The Cleankeys is a gorgeous full-size keyboard, in a suitably clean-looking white colour. Beneath the flat glass surface, keys are laid out with thin grey outlines, with large easy-to-read legends and secondary functions marked in green. The polycarbonate chassis is easy to grip.

IMG_2707

LED indicators are provided for power, caps lock, scroll lock and number lock. LEDs also light up when the volume or sensitivity of the keyboard are adjusted; this is achieved through a Function layer and the pressing of F9 through F12. The Function layer also works with F1 to Pause inputs to the keyboard for cleaning; this also lights an LED.

IMG_2712

On the underside of the keyboard, we have the manufacturer and regulatory information and some rubber feet. The USB cable is sealed upon entry to the keyboard, allowing the keyboard to resist water ingress. It is rated IP65 for water and dust ingress, and the keyboard can operate in temperatures between 5 and 32 degrees celsius.

Typing

Typing on the Cleankeys is just like using a smartphone – you’re tapping on glass, with an optional beep providing feedback on each key press. Unlike a smartphone though, you’re typing on a full-size keyboard, making it easier to type quickly and accurately. I generally found that I typed at about 30~ words per minute using the Cleankeys. That’s slower than I can manage on my daily mechanical keyboard, but much faster than I am typing on a smartphone or tablet.

Screenshot 2014-11-24 04.15.42

I was more accurate when tapping (with two fingers and looking at the keys), but faster when I was touch-typing as normal (with all fingers and looking at the screen). The keyboard includes a special TouchTap mode which allows you to rest your fingers on the keys without registering a keypress and cleverly selects the most likely key if your fingers land between two. You can set the sensitivity of the keyboard and the loudness of the aural feedback as well, allowing you to maximise your speed and accuracy. The sensitivity setting also allows gloves to be used while typing.

IMG_6419-e1413797067487

Of course, the Cleankeys CK3-17 could still be improved. Smartphone style shortcuts and auto-correction, particularly the ability to double tap the space bar to insert a space and period, would be most welcome. With these in place, I feel I could type even more rapidly and accurately, maybe even past the level of a good mechanical keyboard.

Conclusion

Overall, I was impressed with the Cleankeys keyboard. It fulfills its promise of being the most easily cleaned keyboard in the world, and offers surprisingly good typing action as well thanks to its intelligent software and helpful aural feedback. The keyboard makes a lot of sense for medical and industrial settings, and I’m curious to see what innovations the company is able to come up with in the future.

Posted in Articles Tagged with: , , , ,

Red, Blue & Black O-Rings arrive at Keyboard Co

o-rings-2

One of the easiest ways to modify the feel of your keyboard is to add o-rings around the stem of each keycap. These provide a softer landing for each key, reducing the travel distance and muffling the ‘clack’ sound that happens when you bottom out.

There are a couple of key attributes of each o-ring: thickness and hardness. In general:

  • A thicker ring will reduce key travel more than a thinner ring.
  • A softer ring will make a switch quiet more effectively than a harder ring.

We’ve recently added three o-ring sets to our store. Each set comes with 125 o-rings, allowing you to outfit a full keyboard and have a few spares left over as well. Let’s take a closer look at each:

Red O-Rings

This set of red o-rings is made from silicone and has a hardness value of 40A on the Shore durometer. Each o-ring is 1.5mm thick and has an internal diameter of 5mm. These o-rings provide a standard amount of noise and travel reduction, and therefore are a good choice if you’re not sure which variety to choose from.

Blue O-Rings

These blue o-rings are made from EP (ethylene propylene), which is more durable than silicone. These o-rings are also thicker than the red or black varieties, at 1.78mm, with a slightly smaller internal diameter. This means that key travel is reduced more than on the thinner red or black o-rings. The hardness value remains the same at 40A on the Shore durometer, so the amount of noise reduction should be about the same. If reducing key travel is your goal, then these blue o-rings are a good option.

Black O-Rings

Our final set of o-rings are black. They’re similar to the red o-rings, being made of silicone and with a 1.5mm thickness, but they have a hardness rating of 50A on the Shore durometer. That means they’re made of harder rubber, which should make for a more crisp landing and less noise reduction. If you’re looking to reduce key travel distance and not affect the sound of the switch as much, these are a good choice.

o-rings

For more details or to order your o-rings, visit the relevant link below:

Thanks for checking out the article, and be sure to let us know what you think of these o-rings on Twitter @keyboardco, on Facebook or in the comments below. Thanks again and have a great week!

Posted in Articles Tagged with:

Filco Double Shot Keycaps: Installation Instructions and Review

6

Diatec recently released a new set of keycaps for their Filco Majestouch line of mechanical keyboards: The Filco Double Shot keyset.

The name comes from the double-shot moulding process used, where two plastics of different colours are made into a single keycap. The result is a keycap with perfect legends, which never wear down, cannot be felt and looks clean. The Filco Double Shot keycaps also have a higher profile, a more rounded shape and a higher weight compared to standard Filco keycaps. This makes for a different typing feel, which I’ll describe in more detail later.

The Filco Double Shot keycaps are available now from The Keyboard Company in multiple layouts:

In this article, I’ll show you how to install these new keycaps, then give my own impressions after using the keycaps for a couple of weeks.

Installation Instructions

Part 1: Removing your existing keycaps

Some illustrations taken from Ripster’s excellent guide to removing Cherry MX keys.

First things first: to install your new keycaps, you’ll need to remove your existing keycaps first.

Use a key puller to carefully remove each key by sliding the metal portion under the keycap, and pulling up slowly while wiggling from side to side. If you rip off the keycap too swiftly, you may do damage to the switch below.

Remove all of the smaller keys first, but leave the larger keycaps which have metal stabilisers beneath: the space bar, backspace, enter, right shift (and left shift if you are using a USA layout keyboard). If you have a full format keyboard (with numberpad), remove all keycaps on the numberpad section apart from the larger zero, addition and equals keys. Once all of the smaller keycaps are clear, you’ll find it easier to remove the ones with stabilisers.

The space bar comes off first. Use your fingers to lift both sides gently, then push against one side to free the peg from the metal stabiliser bar. Once one side is free, you can move in the opposite direction to finish taking off the switch.

rip

Now use the same technique on the other keys: lift each keycap gently until it clears the stem, push on one side to free the metal from the peg, then move the other way remove the keycap.

Note: As your new Filco Double Shot keycaps already include the little plastic pegs, there’s no need to take them out of your existing keycaps.

5

Once all of the keycaps are removed, you’re free to proceed onto the next part – installing your new Filco Double Shot keycaps. You may find it helpful to clean your keyboard of fluff at this stage, as it’s much easier with all keycaps removed.

Part 2: Installing your new keycaps

Now it’s time to install your new keycaps. Cut open one end of the vacuum-packed bag and slide out the tray of keycaps. These are just sitting on a piece of plastic and aren’t secured once the vacuum seal has been broken, so keep the keycaps flat as you take them out of the bag to avoid tipping them on the floor as I did!

1

Note that each of the larger keycaps comes with the plastic stabiliser pegs already glued into position. The overhanging end of these pegs point towards the back end of the keys, so keep that in mind as you’re installing them.

3

Take each of the stabilised larger keycaps and install them onto your keyboard, using the opposite method to what we did before: slide the peg onto the metal wire, push and hold in that direction to flex the wire, then move the other side down such that the metal goes into the peg.

rip-reverse

Once the pegs are in position on both sides, move the centre of the keycap over the switch and push down gently to finish installing the keycap. It may be helpful to press the key a few times to make sure it’s seated properly.

Once each stabilised key is installed, then the rest of the job is quite simple – just place each small keycap on its relevant switch and press down to seat it.

Once every keycap is installed, you’re done!

Review

After a couple of weeks of using these keycaps, I’ve become quite fond of them. They provide a subtly different look to the keyboard that I’ve installed them on, thanks to their higher clearance and rounded shape. The overall appearance is a little retro, and it makes them stand out from other keycaps on the market. I’ve only seen these keycaps used on a few other keyboards, but I’ve been impressed how they look each time.

I like how the keycaps indicate the F and J keys (the ‘home position’ for your left and right index fingers with a more spherical, more deeply welled shape. It’s a subtle difference when you’re looking at it, but it works perfectly when you’re typing.

4

The increased weight of the keycaps mean less force is needed to actuate each key, which gives the keyboard a slightly lighter feel.

The change in keycap weight also makes for a slightly louder sound, both as you actuate the switch and as you bottom out each key. It’s a refreshing difference that’s made me switch back to my Majestouch-2 after spending quite some time on the Max Keyboard Blackbird.

Of course, one of the biggest benefits of these keycaps is that the legends will never wear away, even after years and years of use. Diatec have produced a few different keycap designs to prevent this issue, such as front-printed (Ninja) keycaps and blank keycaps, but if you prefer the look and utility of top-printed legends then these double shot keycaps are the perfect solution.

Ultimately, I’m pleased with the look, feel and durability of these keycaps, and I think they’ll be staying on my Majestouch-2 for a long time.

8

For more details or to order these keycaps for yourself, visit The Keyboard Company website:

You might also want to read this user review from /u/Fogge on Reddit.

Thanks for checking out the article, and be sure to let us know what you think of the keycaps on Twitter @keyboardco, on Facebook or in the comments below.

Posted in Articles Tagged with: , , ,

LSUCS Charity LAN raises £3550 for two charities

IMG_1675A little while ago we mentioned on Twitter that we were sponsoring the LSUCS Charity LAN, to be held around Valentine’s Day, and today we’d like to tell you a little more about how everything went down!

LAN attendees, their families and friends and charitable strangers online worked together to raise an incredible amount of money for deserving disability charities. £2500 was raised for SpecialEffect, a charity for gamers with disabilities, and £850 was raised in support of Action For Kids, which helps children and young people with physical and learning disabilities. So the Charity LAN was a big success, with all of the various fundraising efforts producing £3350 in donations to the two gaming charities.

The biggest single fundraising activity came as a LSUCS member raised £850 by himself by having his head shaved (having started with hair past his shoulders).

The Keyboard Company took part by donating a Filco Majestouch-2 keyboard, three Silver Storm antimicrobial mice, 5 Flex keyboards, 100 of our famous beer mats and a Raspberry Pi computer. The Pi was used to run a typing challenge, with the highest score winning the keyboard at the end of it. The winner was Dan Cohen, the technical officer of the LSUCS committee! With each attempt costing a small fee, around £100 was raised for charity.

Thanks to the LSUCS committee for running the Charity LAN, the attendees and of course the hundreds of members and non-members that made donations to the cause over the three day event.

We like to work with students and gamers so get in touch via the main website if you are planning something we might be able to help with.

Posted in Articles Tagged with: , ,

Edgar Matias AMA (Ask Me Anything) on Thursday 1PM EST

Edgar Matias, the co-founder of Matias and the designer of Matias keyboards and the Quiet Click switch, will be holding an AMA (Ask Me Anything) on Reddit’s /r/mechanicalkeyboards on Thursday at 1PM EST (that’s 6PM GMT).

This is your chance to ask a pioneer of the mechanical keyboard industry anything you like – whether it’s plans for future keyboards, thoughts on his competitors, insights into his past designs, reflections on Matias’ history, or just whether he would rather fight 100 duck-sized horses or one horse-sized duck. Read more ›

Posted in Articles

KeyboardCo coming to Birmingham for EHI Live 2014

header

The Keyboard Company is coming to Birmingham’s NEC for EHI Live 2014. This event, focused around electronic health products and services, is being held next week on November 4th and 5th.

We’ll be demonstrating Indukey’s range of washable and wipeable anti-bacterial keyboards and the Cleankeys Glass Easy Clean Medical Keyboards. You can try the keyboards for yourself, see how they work and ask questions.

indumedical_rugged_antimicrobial_touchpad_IP65_keyboard_large

The show is happening in Hall 1 at the NEC, which is just outside the Birmingham city centre and easily accessible via car, bus or train. You can even get 25% off train tickets from Virgin Trains to the show.

You’ll find The Keyboard Company at stand G12, towards the left and back of the main hall. A full floorplan is available online and at the show itself. A free registration is required to attend; for more information please check the official EHI Live 2014 website.

Please come to the show if you’re in the Birmingham area! This is a great chance to try out some cool medical keyboards and have a chat with Bruce and John. If you’re coming, let us know by leaving a comment below, or speaking to us on Twitter @keyboardco or Facebook!

Posted in Articles Tagged with: , , ,

Meet KeyboardCo at Office Show!

office-logo-2014Want to try some of the best keyboards and mice in the world? The Keyboard Company is going to the Office* Show on October 7th and 8th, giving you the chance to get up close and personal with some of our most loved input devices – for writing, gaming, cleanliness and more.

We’ll have a wide assortment of keyboards at the event, including a rarity: the Optimus Popularis keyboard. This keyboard is a more affordable but still extremely high-end version of the Optimus Maximus keyboard. It has 77 keys, with an LCD panel behind that allows you to make these keys look like literally anything you want, from common shortcuts to complicated macros. Very few of these keyboards were ever produced, so this is likely your one chance to see it in the wild.

optimus-popularis-stand

We’ll also be bring our best Filco, Max Keyboard and Matias mechanical keyboards for you to try. If you aren’t sure which switch is the one for you, then this is event to go to. We’ll have the keyboards hooked up to some laptops, so you’ll be able to test your typing skills with each and get a real feel of them. This is particularly good for the rarer keyboards on offer, including the beautiful electro-capacitive feel of the Topre keyboards and the Quiet Click switches of some Matias keyboards. We’ll even have the Truly Ergonomic keyboard on station, which is sure to confuse – at first – and then amaze!

Befitting the show, we’ll also come prepared with a range of fully washable Seal Shield keyboards and mice, appropriate for industrial, medical or just plain messy settings. If you want a keyboard that can easily be washed, dried and put into service, you’ll definitely want to try these keyboards out. We’re also introducing a new super-sterile all-glass keyboard called Cleankeys, which is quite remarkable. We’re rounding out the washable category with the Sterile Flat, another excellent keyboard for anyone that’s keen to stamp out germs.

office-show-600

Entry to the Office* Show is free, but you must register for a pass before the event. We’ll be at booth 5030, towards the left side of the hall as you enter.

The show is being held at Olympia in London, which is easy to reach via underground, bus, train or car. For more information on getting to the event and other details, please visit the official website at officeshow.co.uk.

2013-10-08-10.44.10

Are you going to the Office* Show? Let us know by leaving a comment below, or speak to us on Twitter @keyboardco or on Facebook at KeyboardCo.

Thanks for checking out the article, and we hope to see you at the show!

Posted in Articles Tagged with: ,