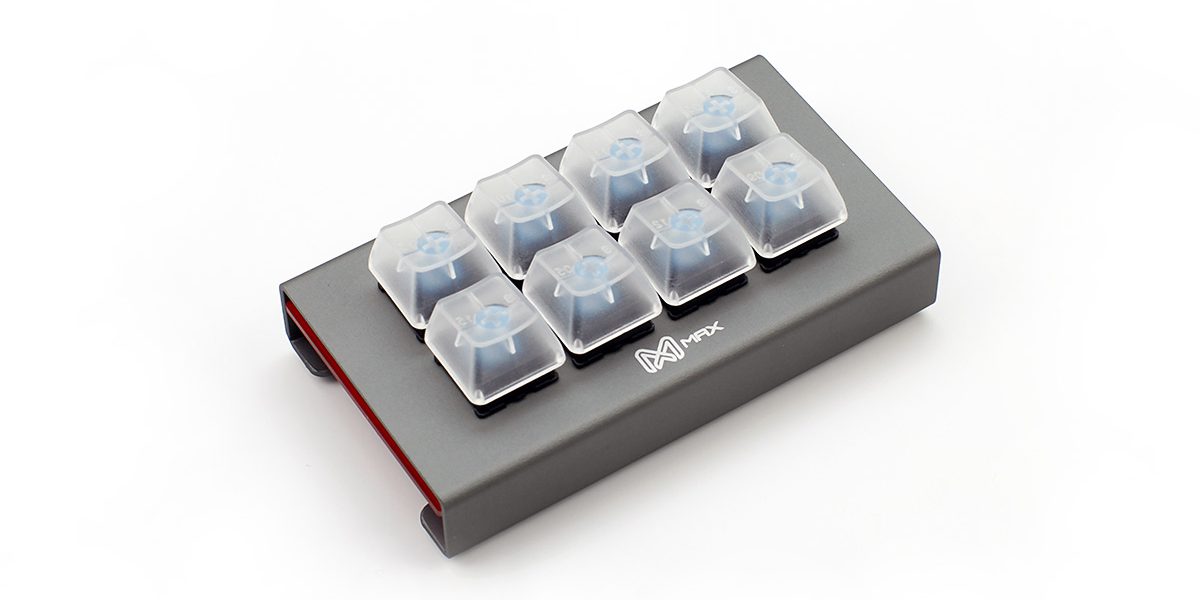
It’s long been my dream to make my own keyboard. Almost every day it seems that there’s someone new on Twitter or Reddit that’s produced a gorgeous custom keyboard, and I can only marvel at the self-made layouts, beautiful engineering and exotic materials used in their construction. This week though, I got a little closer to my dream as I built my own (tiny) keyboard. It’s available as a kit from KeyboardCo, and it’s called the Max Keyboard Falcon-8.
Unboxing
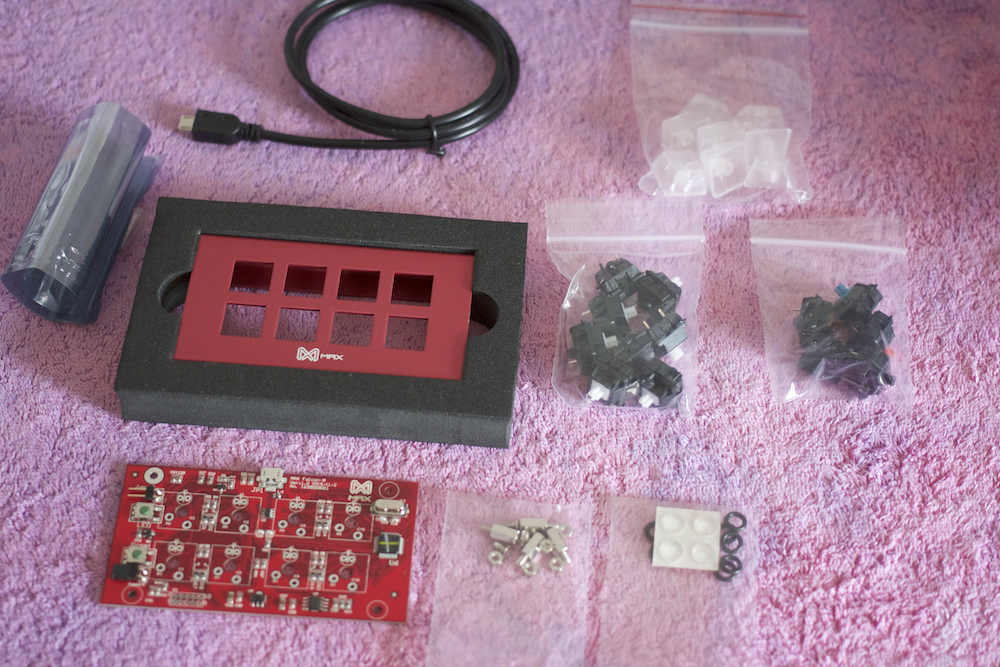
The Falcon-8 requires a little construction before it’ll work, but you’re given everything you need to get started inside the box — apart from a soldering iron.
(We’ll also offer the Falcon-8 pre-assembled in the future, if you’d prefer.)
There’s the board itself, a collection of switches (in your choice of colours), some matching transparent keycaps, LEDs and a case. There’s also a micro USB cable to connect the board to your PC, some screws and some little plasticky stickers.
The build
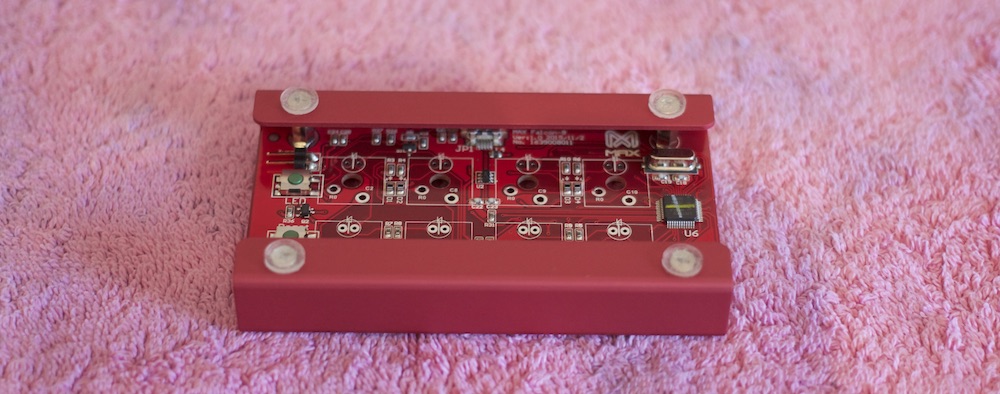
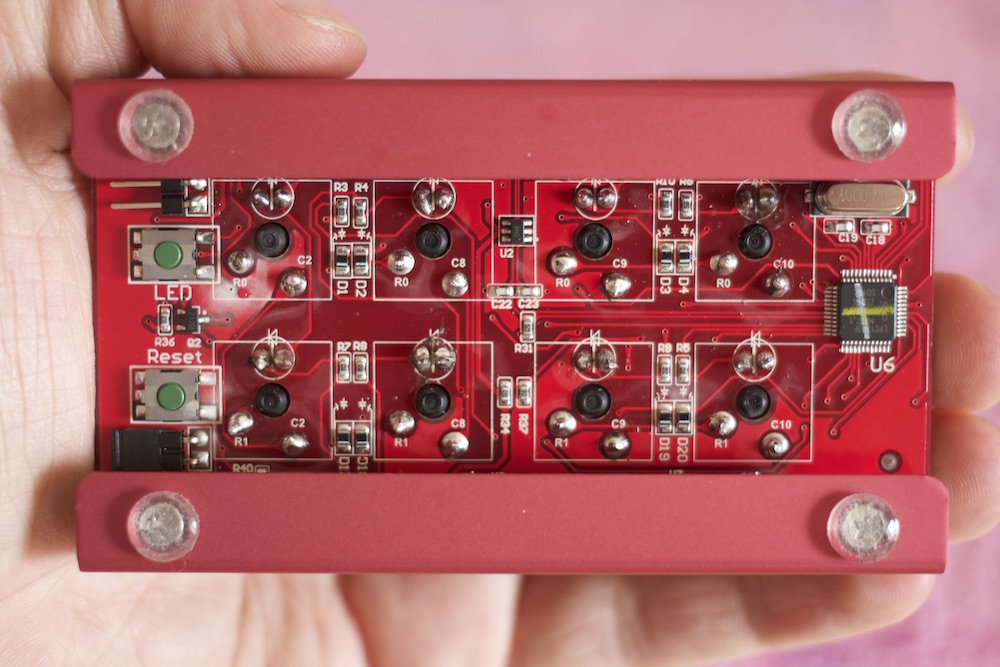
The first step of preparing the Falcon-8 for use is to put it together. This is pretty easy — just place the circuit board into the metal case, add screws to secure it, then cover the screws with some rubbery feet to ensure the finished product doesn’t skitter around your desk. Then it’s time to pop in the switches, and your keyboard is starting to look complete.
After that, it’s time to get out your soldering iron! I picked one up off Amazon for about £15, and it came with some solder and different tips. You could also use a stand and sponge, and either a solder sucker or braid to remove solder if you get things a bit wrong.
Now I’ve never used a soldering iron before, so I was a little scared of using it on a keyboard (even a tiny one designed to be built this way). Thankfully, it’s pretty simple stuff; as long as you keep the hot tip away from everything but the solder, you can’t go too far wrong. The solder naturally forms cute little cones over the connections to the switch, so it’s just a case of adding a bit of solder in approximately the right area, then moving onto the next bit. All told, it took me only a couple of minutes to do all sixteen connections.
Next is the somewhat trickier bit: adding the LEDs. You need to push an LED into each switch, then hold it in place while you’re soldering the two pins to the board.
The board remains upside-down at this point, so gravity will want to pull the LEDs back out of the switch. Remember this, and keep the LEDs in position until the solder has hardened, or you’ll end up with LEDs that sit too high up and bash into the keycap when it’s depressed! You also need to ensure that your two piles of solder remain separated, so be sparing with the amount that you use.
Once soldered, the excess metal is clipped from the ends. I ended up using good old metal fatigue as I couldn’t be bothered to fetch my clippers, and I ended up with slightly jagged edges. Don’t be lazy like me; do this properly!
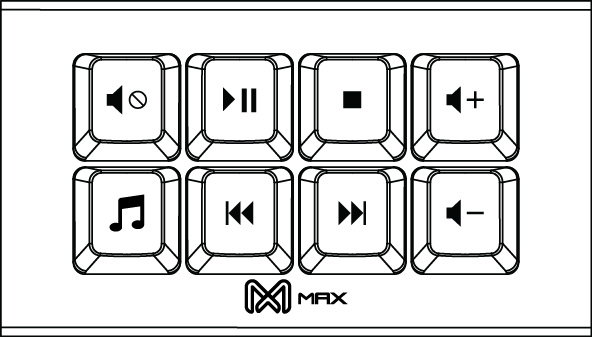
Once the solder has dried, you’re good to go! Add your keycaps and connect up the keyboard to your PC, and test to make sure all the keys work (I used VLC on a multi-song playlist to test each button’s default bindings, shown below).
n.b. If you’re removing or changing keycaps, remember to wiggle them as you pull them off. I ended up having to replace one switch after I pulled its cap off a little too hard; the keycap remained in place but the inside portion of the switch came out of its housing! Whoops.
Programming
The Falcon-8 comes out of the box with some useful functions already pre-programmed: media keys! The diagram below shows the layout, incorporating volume and playback controls. You can launch your media player, skip back and forth, turn up for what, etc etc.
Changing these bindings is extremely easy. You just have to move a jumper on the bottom of the board, press the rest button twice, and start up the Progamming / Configurator app (I used version 2.1, available here) for Windows.
Then, it’s just a case of selecting which key you want to reconfigure, and choosing its new function. You can make it mirror any key on the keyboard, as well as set up more complex macros. You could also set up macros in something like AutoHotkey, if you preferred. Once you’re done, reset the Falcon-8 and switch the jumper back over, and you’re good to go.
Either way, it’s pretty easy to get basic functions going, and it’s deep enough that you can perform quite complicated actions once you get your head around the programming interface.
Lighting
The Falcon-8 comes with backlighting for all eight keys. By default these flash rhythmically, but you can choose to keep them on all the time, react to your key presses, extinguish them altogether and more. There’s a small button on the underside of the board that switches between different modes.
Wrapping up
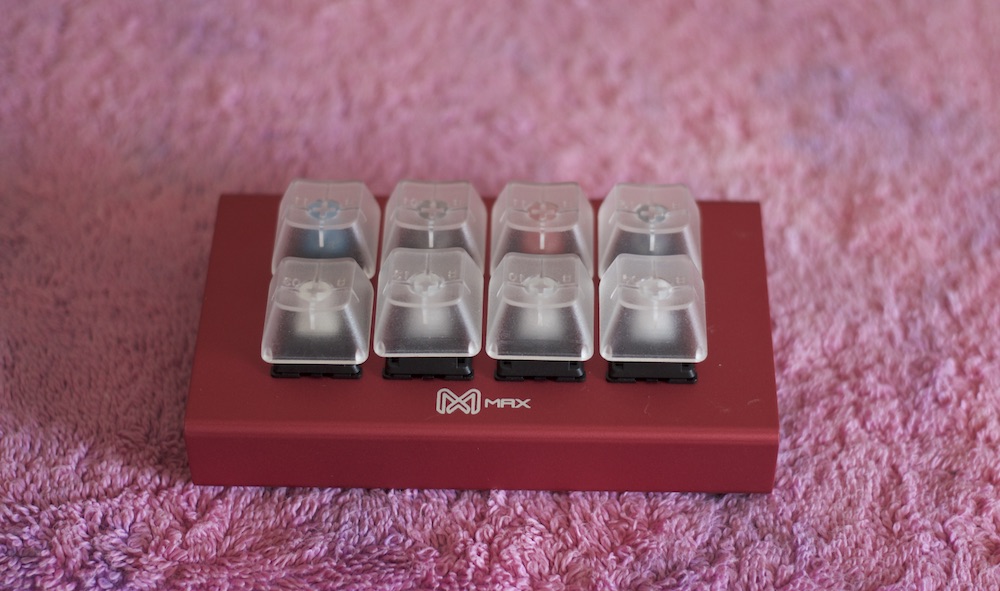
Now that it’s complete, the Max Keyboard Falcon-8 remains proudly on my desk, where I’m using it to add macro keys to my small form factor keyboard and control the volume on my PC. I also installed five different MX switches, making it a good switch tester as well. Despite my amateur soldering, it’s working great and the metal case ensure it feels solid too. Awesome.
I hope you’ve enjoyed this look at building, programming and using the Falcon-8 from Max Keyboard and KeyboardCo! I certainly had a lot of fun building it, and I’m excited to see what these boards will be used for in the future. It’s also made me more confident in my abilities, and I feel better prepared for making my own custom board in the future. Cool stuff all around.
Thanks for checking out the article. Be sure to let us know what you thought in the comments, or talk to us on our regular social media channels. Thanks again and enjoy the rest of your week!
Recent Comments