Matias Wireless Aluminum Keyboard hands-on review

DSC_8136

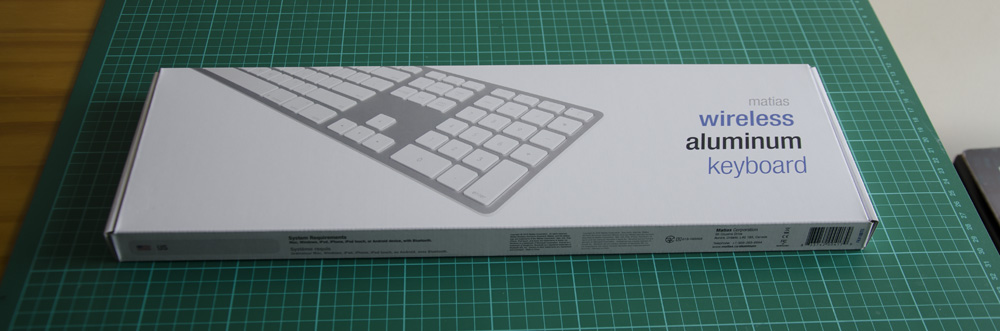
Today, we’re taking a look at the latest from Matias: the Wireless Aluminum Keyboard. This keyboard is designed as a full format alternative to the Apple Wireless Keyboard, offering a similar style but with Bluetooth and a number pad. They’re arrived in stock at KeyboardCo, so let’s go hands-on and have a look!

Our first impressions

DSC_8205

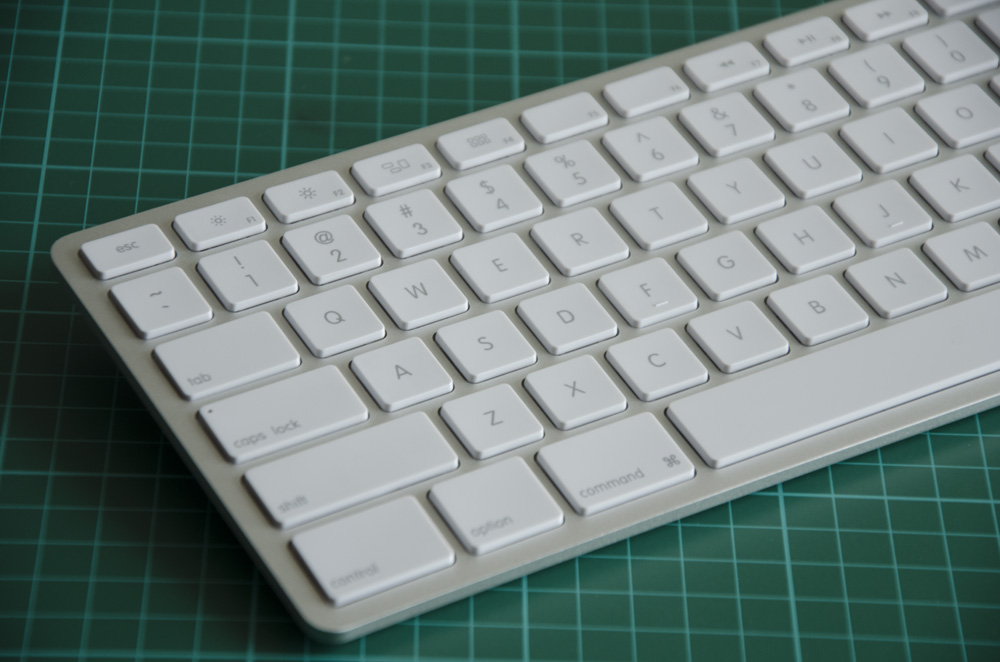
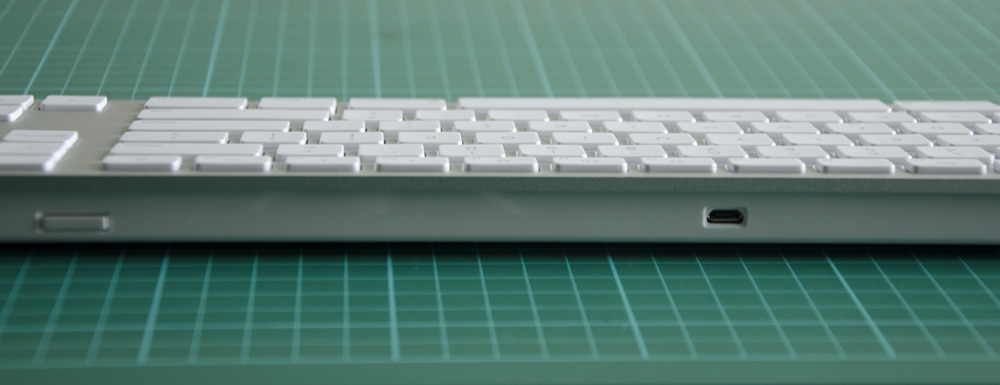
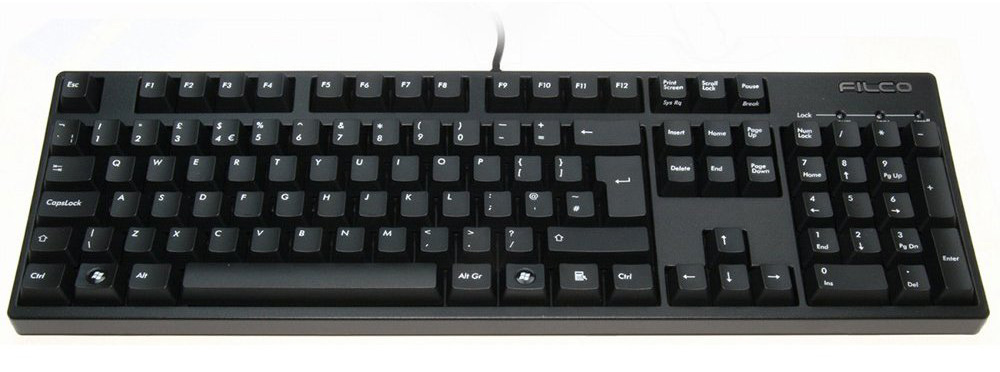
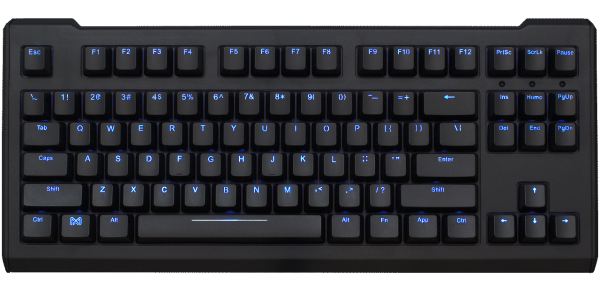
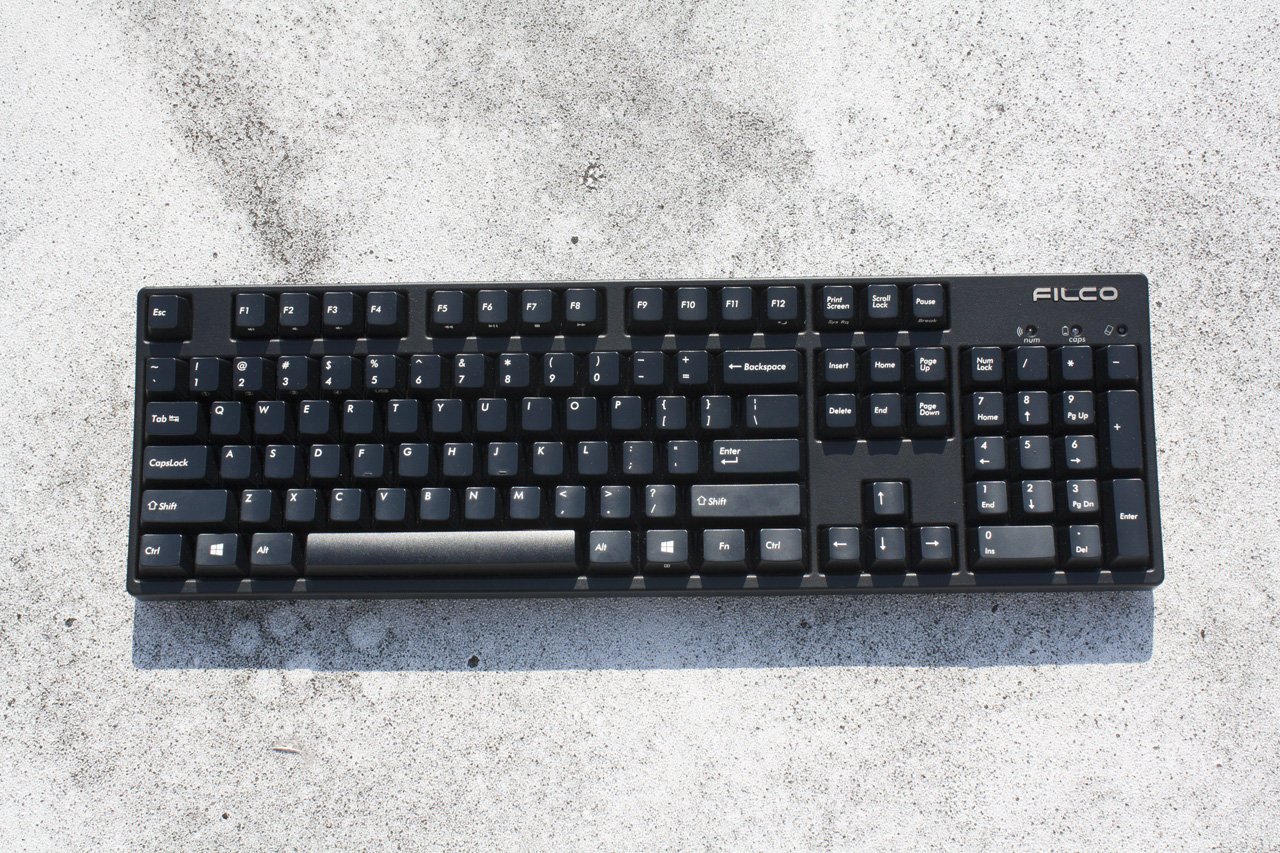
The first thing you’ll notice is how solid this keyboard feels in your hands. It’s made from a single piece of aluminium, giving it impressive rigidity and strength. It’s cool to the touch as you take it out of the box, and warms up nicely as you begin to type away.

Under the fingers, this Matias keyboard feels very similar to Apple’s own. There’s a good amount of travel in the keys, and the low profile keycaps make it easy to glide around the keyboard at some speed.

DSC_8160

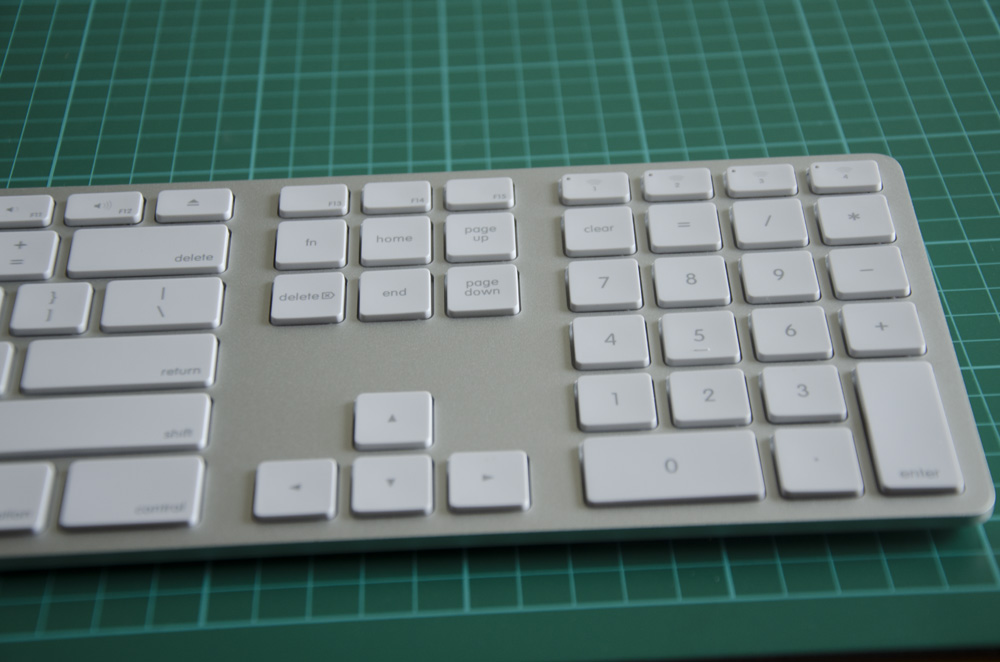
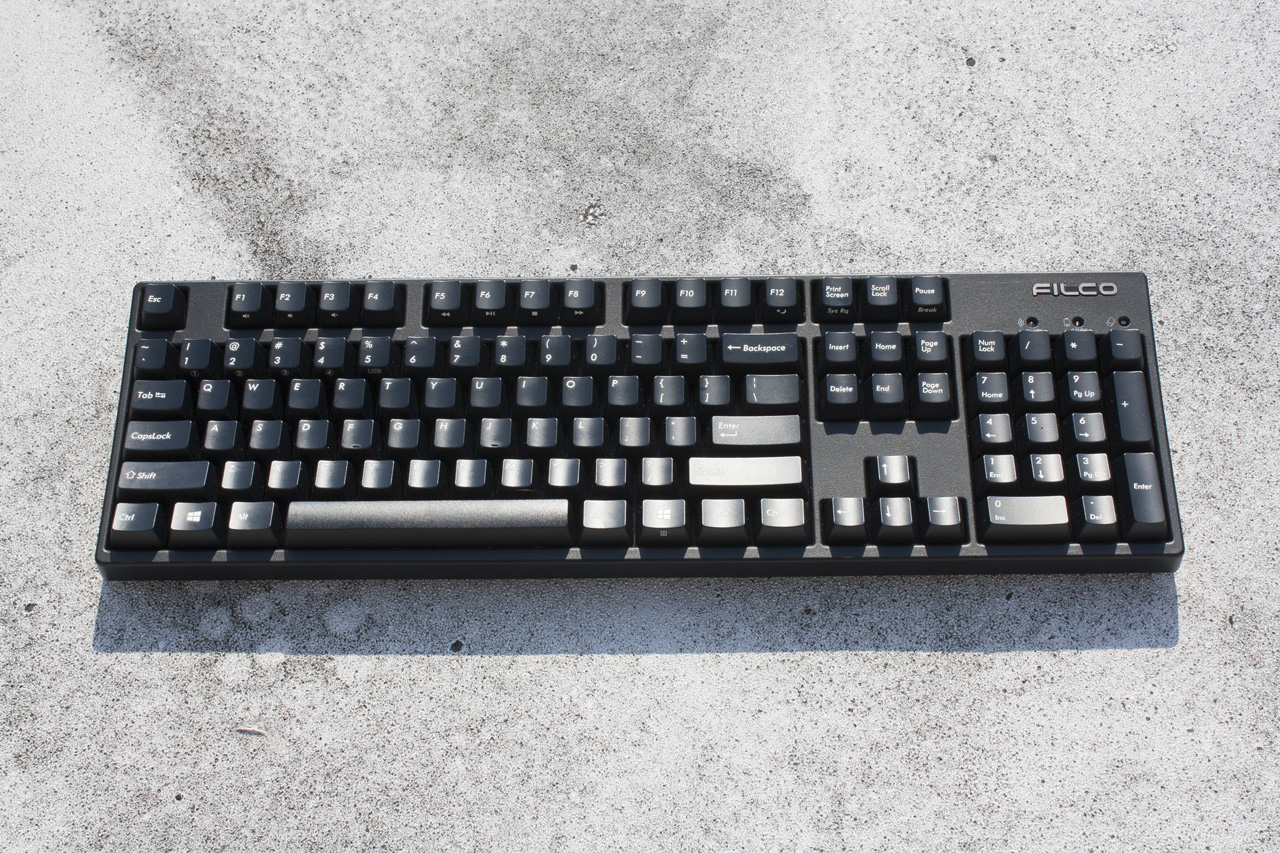
There are function keys at the top for performing common commands like raising the volume or adjusting your screen brightness, and of course there’s that full number pad on the right hand side. This is brilliant for anything that requires typing numbers often, like math work, spreadsheets or data entry.

It’s a standard Mac layout, but it will work with Windows, Android and other operating systems too — you’ll just need to ignore some of the legends on the keys!

DSC_8199

On your desk, the Matias Wireless Aluminum Keyboard is just as pretty as Apple’s model, and pairs nicely with an Apple Magic Trackpad or Magic Mouse. There are a few keyboards that attempt to mimic Apple’s aesthetic, but Matias get it dead on, and back it up with quality materials and a sensible design.

The Wireless Aluminum keyboard is available in four colours in US layout; this is the silver model. The other options are gold, rose gold and space grey — which you might recognise as the current colour options for the iPhone, iPad and MacBook. If you want a perfectly matching keyboard, we’ve got you covered. We’ve also got the UK layout model in silver.

1

Initial setup

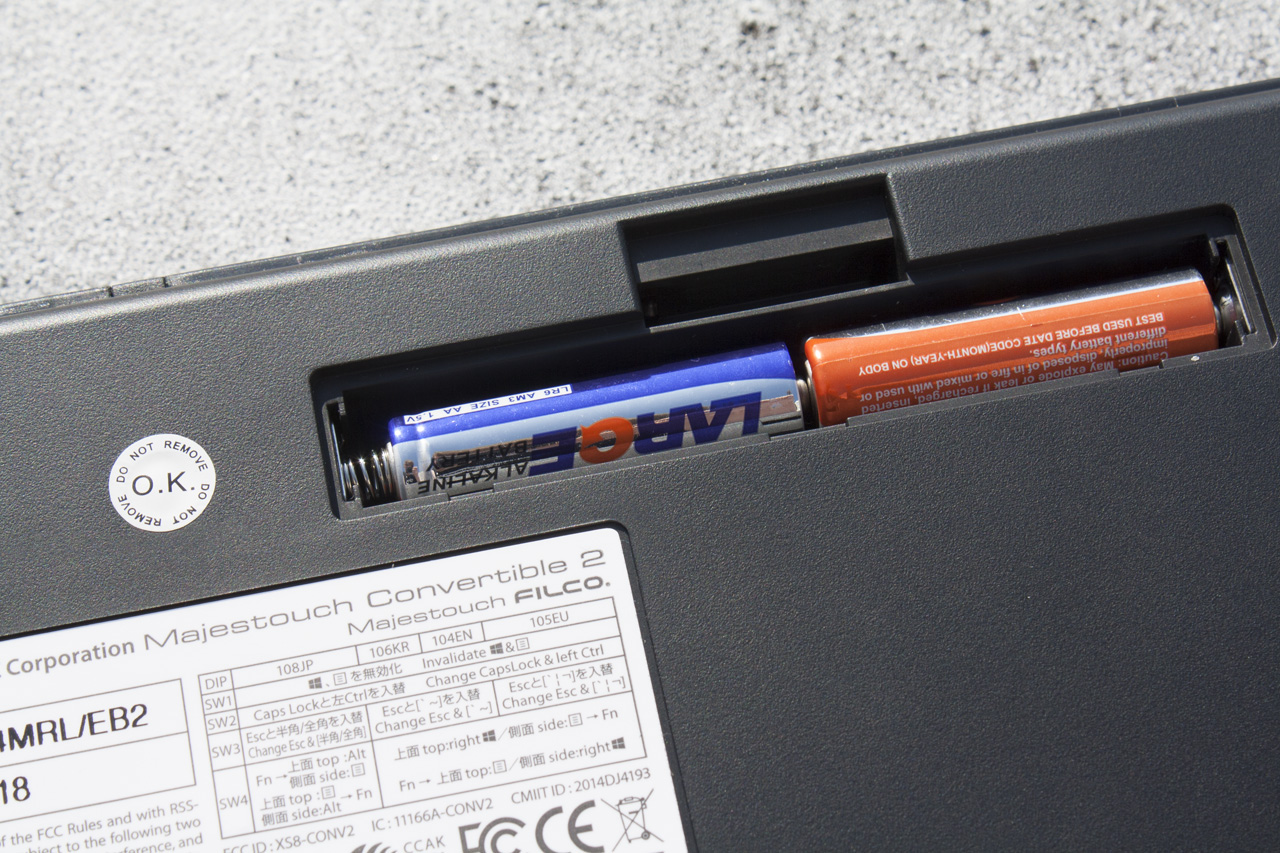
You get a Micro USB charging cable in the box, and you’re encouraged to let the keyboard charge fully before starting to use it. That’s sensible advice, so I left the keyboard plugged in for a few hours, until the amber light on the Caps Lock key disappeared. Once charged, the keyboard should last a year before needing another top-up, so this initial wait is pretty understandable.

DSC_8210

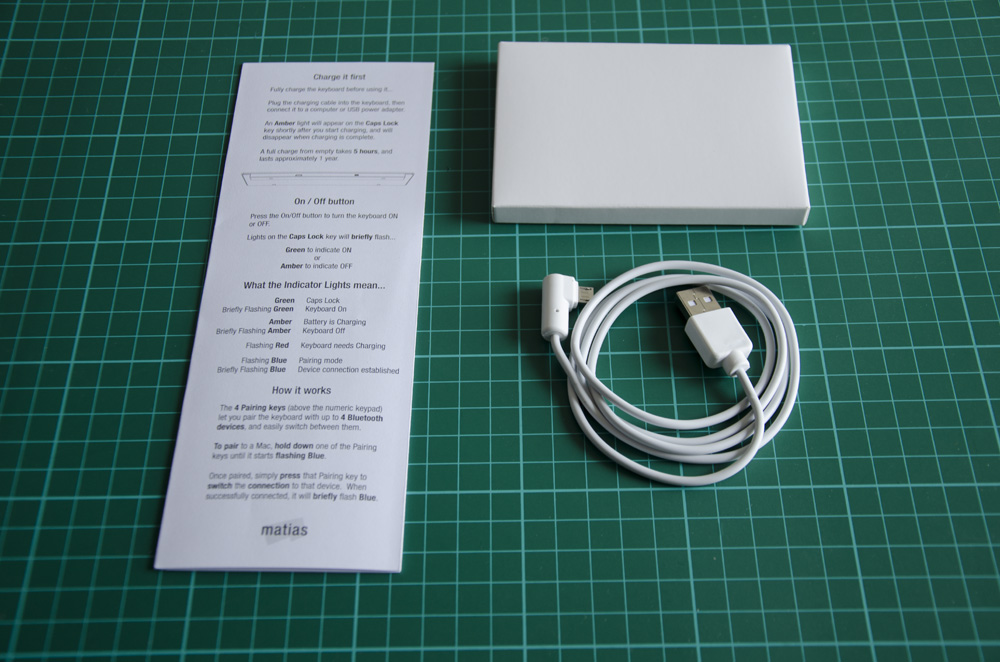
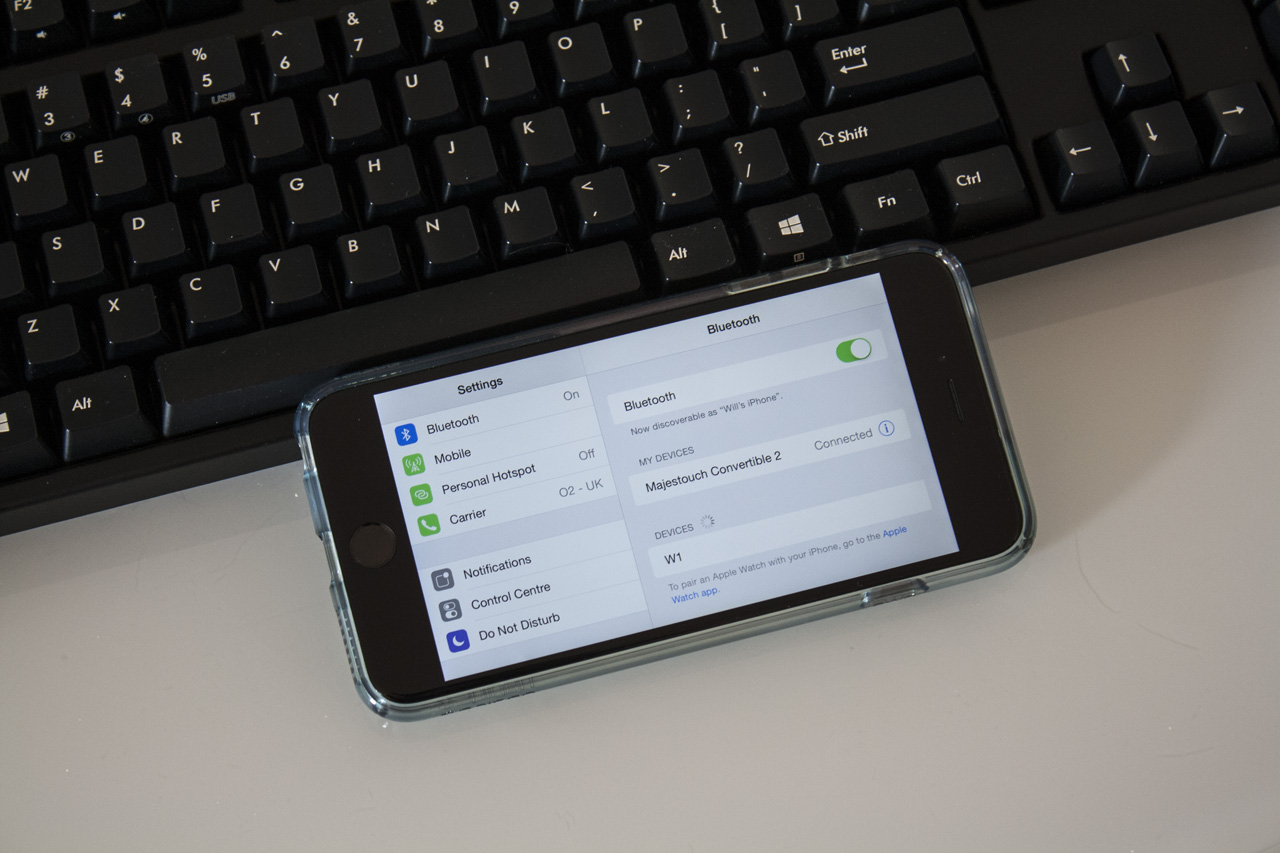
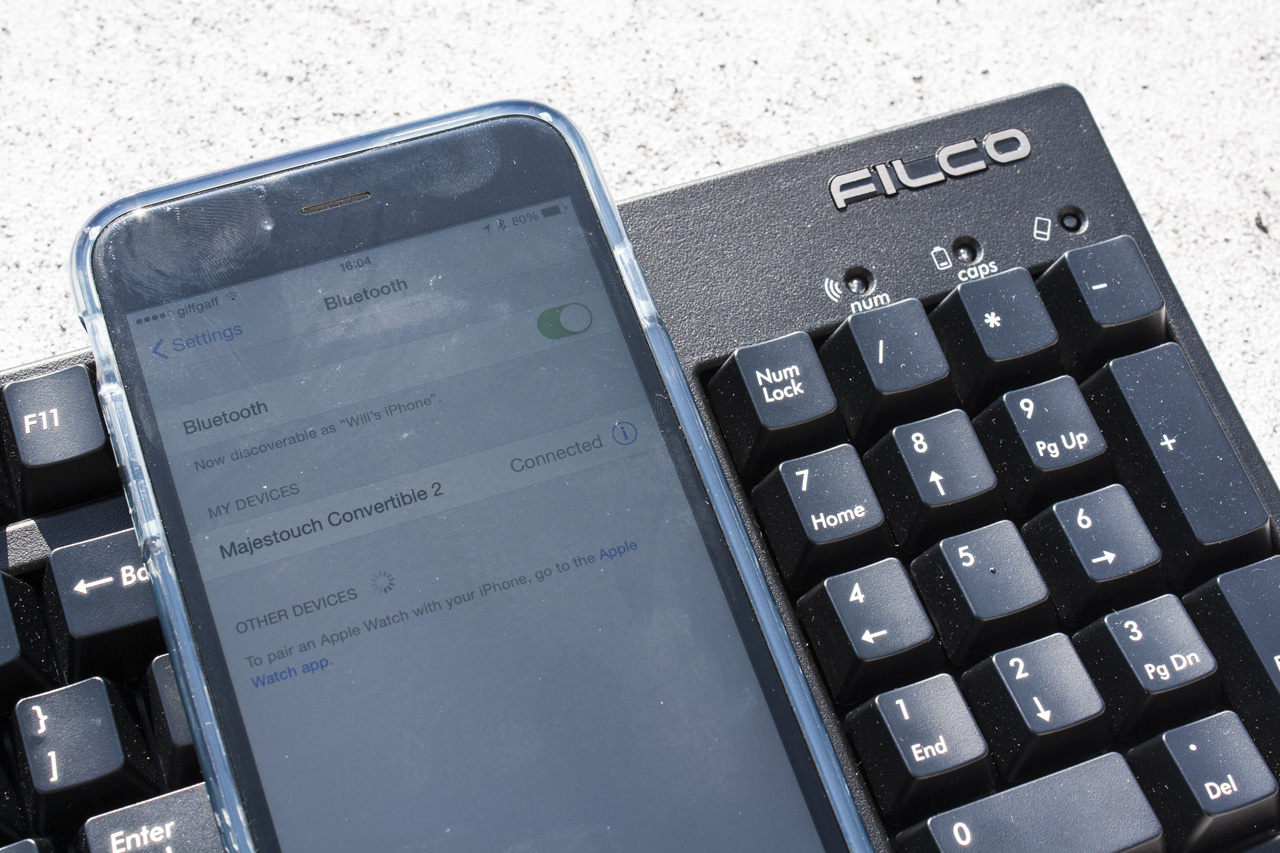
Once it’s ready to go, you just need to pair it with your device — which can be an iPhone, an iPad, a Mac laptop or desktop, a Windows PC of any description, or even an Android phone or tablet. Simply turn on the keyboard via the on/off switch on its back, then press and hold one of the four pairing keys above the numberpad. This key will start flashing blue to let you know it’s ready to pair, and then you pair as you normally do on your device of choice.

DSC_8195

The process takes only a few seconds, and once pairing is complete you can re-engage the connection by pressing one of these Bluetooth keys again. There are four in all, so you can store four Bluetooth connections simultaneously and switch between different devices with ease. If it sounds complicated, it’s really not, and it’s all explained very carefully in the instruction card that accompanies the keyboard.

Closing thoughts

The Matias Wireless Aluminum keyboard is a nice addition to any desk. It’s stylish, well-designed and gets the job done. Because it’s Bluetooth, you can use it with basically every device you own, from laptops and desktops to smartphones and tablets. If you’re looking for a full-size keyboard with a number pad and you like Apple’s style, this is a great choice.

The Matias Wireless Aluminum Keyboard is available now at KeyboardCo. Choose the colour of your choice to see more information and get one for yourself!

UK layout

USA layout

Posted in Articles, Reviews Tagged with: , , , , ,

Max Keyboard Falcon-8: build your own 8% keyboard for macros, media control & more

FALCON-8-1

It’s long been my dream to make my own keyboard. Almost every day it seems that there’s someone new on Twitter or Reddit that’s produced a gorgeous custom keyboard, and I can only marvel at the self-made layouts, beautiful engineering and exotic materials used in their construction. This week though, I got a little closer to my dream as I built my own (tiny) keyboard. It’s available as a kit from KeyboardCo, and it’s called the Max Keyboard Falcon-8.

Unboxing

The Falcon-8 requires a little construction before it’ll work, but you’re given everything you need to get started inside the box — apart from a soldering iron.

(We’ll also offer the Falcon-8 pre-assembled in the future, if you’d prefer.)

There’s the board itself, a collection of switches (in your choice of colours), some matching transparent keycaps, LEDs and a case. There’s also a micro USB cable to connect the board to your PC, some screws and some little plasticky stickers.

IMG_7203 copy

The build

The first step of preparing the Falcon-8 for use is to put it together. This is pretty easy — just place the circuit board into the metal case, add screws to secure it, then cover the screws with some rubbery feet to ensure the finished product doesn’t skitter around your desk. Then it’s time to pop in the switches, and your keyboard is starting to look complete.

IMG_7205 copy

After that, it’s time to get out your soldering iron! I picked one up off Amazon for about £15, and it came with some solder and different tips. You could also use a stand and sponge, and either a solder sucker or braid to remove solder if you get things a bit wrong.

Now I’ve never used a soldering iron before, so I was a little scared of using it on a keyboard (even a tiny one designed to be built this way). Thankfully, it’s pretty simple stuff; as long as you keep the hot tip away from everything but the solder, you can’t go too far wrong. The solder naturally forms cute little cones over the connections to the switch, so it’s just a case of adding a bit of solder in approximately the right area, then moving onto the next bit. All told, it took me only a couple of minutes to do all sixteen connections.

Next is the somewhat trickier bit: adding the LEDs. You need to push an LED into each switch, then hold it in place while you’re soldering the two pins to the board.

The board remains upside-down at this point, so gravity will want to pull the LEDs back out of the switch. Remember this, and keep the LEDs in position until the solder has hardened, or you’ll end up with LEDs that sit too high up and bash into the keycap when it’s depressed! You also need to ensure that your two piles of solder remain separated, so be sparing with the amount that you use.

Once soldered, the excess metal is clipped from the ends. I ended up using good old metal fatigue as I couldn’t be bothered to fetch my clippers, and I ended up with slightly jagged edges. Don’t be lazy like me; do this properly!

IMG_7211 copy

Once the solder has dried, you’re good to go! Add your keycaps and connect up the keyboard to your PC, and test to make sure all the keys work (I used VLC on a multi-song playlist to test each button’s default bindings, shown below).

n.b. If you’re removing or changing keycaps, remember to wiggle them as you pull them off. I ended up having to replace one switch after I pulled its cap off a little too hard; the keycap remained in place but the inside portion of the switch came out of its housing! Whoops.

Programming

The Falcon-8 comes out of the box with some useful functions already pre-programmed: media keys! The diagram below shows the layout, incorporating volume and playback controls. You can launch your media player, skip back and forth, turn up for what, etc etc.

Falcon-8-media-key

Changing these bindings is extremely easy. You just have to move a jumper on the bottom of the board, press the rest button twice, and start up the Progamming / Configurator app (I used version 2.1, available here) for Windows.

Then, it’s just a case of selecting which key you want to reconfigure, and choosing its new function. You can make it mirror any key on the keyboard, as well as set up more complex macros. You could also set up macros in something like AutoHotkey, if you preferred. Once you’re done, reset the Falcon-8 and switch the jumper back over, and you’re good to go.

Either way, it’s pretty easy to get basic functions going, and it’s deep enough that you can perform quite complicated actions once you get your head around the programming interface.

Lighting

The Falcon-8 comes with backlighting for all eight keys. By default these flash rhythmically, but you can choose to keep them on all the time, react to your key presses, extinguish them altogether and more. There’s a small button on the underside of the board that switches between different modes.

Wrapping up

IMG_7209 copy

Now that it’s complete, the Max Keyboard Falcon-8 remains proudly on my desk, where I’m using it to add macro keys to my small form factor keyboard and control the volume on my PC. I also installed five different MX switches, making it a good switch tester as well. Despite my amateur soldering, it’s working great and the metal case ensure it feels solid too. Awesome.

I hope you’ve enjoyed this look at building, programming and using the Falcon-8 from Max Keyboard and KeyboardCo! I certainly had a lot of fun building it, and I’m excited to see what these boards will be used for in the future. It’s also made me more confident in my abilities, and I feel better prepared for making my own custom board in the future. Cool stuff all around.

Thanks for checking out the article. Be sure to let us know what you thought in the comments, or talk to us on our regular social media channels. Thanks again and enjoy the rest of your week!

Posted in Articles, Reviews Tagged with: , , , , , ,

Exciting news from Topre

Super Premium Gaming Keyboard REALFORCE RGB for Gamers

Posted in News Tagged with: , ,

Guest blog: A translator’s conversion to a mechanical keyboard

As a translator, I spend many hours a day at my computer, yet for years I didn’t give my keyboard a second thought. I switched happily between a basic external keyboard – the sort that comes bundled with a desktop computer – and my laptop keyboard when I was out and about. After all, I thought, if it ain’t broke, don’t fix it.

Six months ago, I was asked to give a webinar on typing tips for translators (on touch typing, shortcuts and other time-saving solutions) and I exchanged a few emails on keyboards and layouts with The Keyboard Company experts, who casually mentioned that “mechanicals are like the old car advert… Once driven, forever smitten”. Fascinated to discover what I had been missing all these years, I bought a Filco Majestouch-2.

s-filco_majestouch_2_uk_large

Remember what it’s like when you buy a new kitchen knife? You suddenly realise how blunt your old knives are. I’d spent years typing on a mushy keyboard, not realising how much effort I had to make for each keypress. I wasn’t getting any aches or pains and I could type fairly fast on it (I average about 75 words per minute). Why splash out on a new keyboard if you’re getting on OK with your present one?

Well, a membrane keyboard gets harder to type on as time goes by because the rubber domes under each key get stiffer. It happens gradually so you’re not aware of the change. It’s a bit like putting on weight: you don’t notice until you get on the scales one day or try to squeeze into last year’s jeans.

Mechanical switches

Mechanical keyboards are completely different. From the very first test run, I was smiling. If you’ve ever tried mechanical switches, you’ll know what I’m talking about.

The Cherry MX Brown switches are a joy to type on. They have a bright, crisp feeling, with a slight bump (tactile feedback) to tell you when the keypress has registered just half way through the key travel. That’s totally different from a membrane keyboard, where you have to press each key right down to the base (bottoming out, as the experts say). With a mechanical keyboard you can type more lightly. It was actually quite hard not to bottom out the keys on my Filco to begin with, but after a few days I’d learnt to exert just the right pressure. I don’t think I’m typing faster now, but I’m definitely typing more lightly.

5

Noise

What about the noisy reputation that mechanical keyboards have? Well, for a start, many freelance translators work from home and not in an office, so there’s not much of a chance of bothering coworkers (unless you count your cat). On the other hand, I was a bit concerned that the clicky keys might invade the peace of my silent home office. Fortunately it hasn’t bothered me at all. I know brown switches are quieter than others (blue being the noisiest), but I actually find the rhythmic clatter quite conducive to keeping up a good translating pace.

Layout

I wanted a keyboard with a Spanish layout. It’s easy to switch input language with Windows and I can key in an ñ or an é without looking down, but with an English layout I confuse curly brackets, asterisks and other rarely-used symbols. The Filco Majestouch-2 comes in a wide range of languages, so it was a perfect choice for me.

s-filco_majestouch_2_spanish_large_1

Cost

For professional translators who have a keyboard at their fingertips all day, the extra cost of a mechanical keyboard should be a minor consideration in their work set-up. We invest in the latest software and up-to-date hardware components; a good quality keyboard should go hand in hand with those investments. If you calculate the cost per year of keyboard life, the investment is actually minimal.

Reliability

The downside is that mechanical keyboards seem to have more teething problems than others, and I was unlucky that I had to return my first Filco due to occasional keystroke issues.

The upside is that a mechanical keyboard is an investment that will last. They have a longer lifespan than their membrane counterparts, which is good news for translators who crunch their way through 2-3 million keystrokes a year.

The acid test

After several months, I went back to my old Logitech membrane keyboard, just out of interest. It was stodgy and tiring to type on. After just half an hour, I could feel the finger fatigue. Honestly, I cannot believe I ever thought this was comfortable.

What keyboards do other translators use?

You’d think that most translators would be mechanical keyboard fans. Or that they’d go down another road and use ergonomic keyboards.

Well, you’ll be surprised to learn that just 3% use mechanical switches and only a small proportion, 17%, use ergonomic keyboards.*

Keyboard type_1

* Data from a survey carried out in January 2016 among 817 translators

Why so few?

I’d love to find out why so few translators use mechanical keyboards. Is it the expense? Is it because they’ve simply never tried one out?

s-Emma-Goldsmith
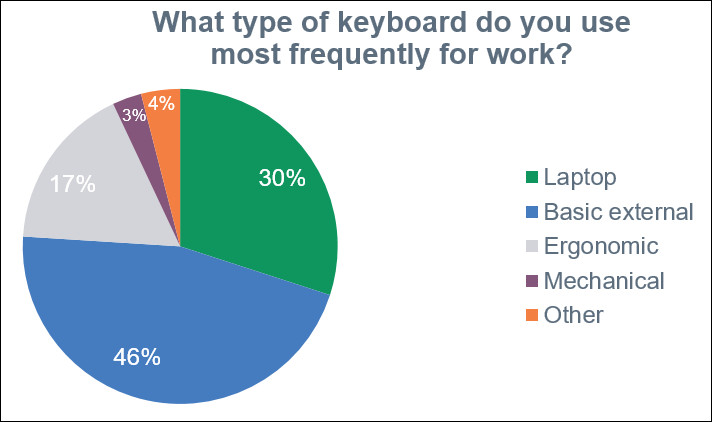
Please drop a comment below with your thoughts on this. Which keyboard do you use and why?

And if you’re not a translator, but would like to share your favourite keyboard and the reasons you chose it, I’d love to hear from you too!

Emma Goldsmith is a freelance Spanish to English medical translator who made a career switch from nursing some 25 years ago. She translates a wide range of texts, from cardiology research articles in medical journals to the leaflets that come in medicine boxes. Find out more about her at goldsmithtranslations.com.

Posted in Articles, Reviews Tagged with: , , , ,

Our favourite typing games

With a good keyboard beneath your fingers, typing is a joyful experience. Particularly when you pick up a new keyboard — or upgrade an old one — you just want to type for hours. You could write that novel you’ve always had in the back of your head… but how about some games instead? Here are a selection of our favourites.

Epistory

20160401042131_1

Epistory is billed as ‘an atmospheric adventure typing game’, where you sit atop a magical three-tailed fox and explore beautifully drawn landscapes. Exploring a paper-craft fantasy world, you type words to defeat monsters, unlock new areas and bash open treasure chests. It’s a relaxing experience, right up unto the point that monsters start pouring out of the woods and only machine-gun-style typing will push them back.

The game starts slow, with three or four-letter words, but intelligently ramps up in difficulty to match your abilities. You can upgrade your vulpine mount’s speed, set monsters ablaze or pinpoint areas of interest, each new ability bringing new tactical possibilities.

While the typing action is a satisfying test of your abilities, the world itself is the biggest draw here. The beautiful origami art style, occasional voice over from the protagonist and haunting music all add to the atmosphere. Of all the games on this list, it’s Epistory that I’m going to back to and finish — I need to know what happens!

Epistory is available for £9.89 on Steam right now.

ZType

ztype

ZType is a typing space shoot-’em-up, where you have to defeat waves of alien invaders with rapid typing skills. The retro graphics and sound effects fit the theme well, and the action ramps up smoothly to accommodate novices and challenge experts.

Unique among its peers, ZType is available on phones and tablets as well as on the web. This is achieved through a clever keyboard software embedded in the game, which allows you to type at speeds resembling a full keyboard. Of course, you can also use a Bluetooth mechanical keyboard if you really want to hit that high score.

ZType can be played here for free, and is also available on iOS and Android.

The Typing of the Dead: Overkill

Overkill-2

The Typing of the Dead is a classic game from ’99, first on arcade machines and most famously on the Sega Dreamcast. A simple conversion of a light gun arcade shooter called House of the Dead, you’re tasked with typing out words and phrases to dispatch on-screen (mostly zombified) opponents and progress through each plot-light, action-heavy episode.

Overkill is a modern remake for PCs, and it provides a pretty decent workout for your fingers. The developers have made plenty of DLC too, so once you get tired of the (fairly substantial) base game, you can check out themed collections on the topics of science fiction, television, Shakespeare and many more.

Be warned that the game is largely NSFW, thanks to both profanity and violence. It’s available on Steam for £14.99

Type Racer

type-racer

Sometimes the classics are the best. Type Racer is one of the best-known typing games, a multiplayer web game that challenges you to write a passage of text as quickly as you can manage. You’ll see your car zip across the screen as you go, and there’s a lot of pressure to keep pace with the other racers in your game. As well as randomised multiplayer matches, you can also challenge your friends or practice in a single-player mode.

You can play Type Racer online here.

Signing off

Those are our favourites. What are yours? Let us know in the comments below!

Posted in Articles, Reviews Tagged with: ,

What is NKRO? Our guide to rollover, anti-ghosting and choosing the right keyboard

What is n-key rollover?

N-key rollover is commonly cited as an advantage of choosing a mechanical keyboard over a rubber dome alternative, but the concept often isn’t well explained. In this article, we’ll explain what we mean by rollover, how keyboard rollover is classified and show you how to test rollover for yourself. We’ll also give some hints on what you should look for when you’re buying a new keyboard.

What does rollover mean?

Rollover is simply how well your keyboard can correctly register multiple keys being pressed simultaneously. When typing slowly, you’re probably typing one key after another, but if you’re writing more quickly or playing a game, it’s very likely that you’ll be holding down, pressing and releasing multiple keys simultaneously. Musical instrument emulation and Plover (a stenotype software) also require many keys to be pressed simultaneously, and therefore require sufficient rollover.

How are keyboards classified in terms of rollover?

Not all keyboards are created equal when it comes to rollover. Where one keyboard might be able to handle half a dozen or more inputs, others might struggle to correctly recognise three keys pressed simultaneously.

Rollover is quantified as n-key rollover, where n is the minimum number of keys that can be correctly registered when pressed simultaneously. This is often written in its short form KRO. For example, 2–key rollover becomes 2KRO.

Many inexpensive keyboards have only 2KRO, while higher-end keyboards (and many mechanical keyboards) have 6KRO or higher. If a keyboard can register all of its keys being pressed simultaneously, then this is called NKRO.

Note well that this limit doesn’t include modifier keys like Ctrl, Alt, Win or Shift.

Note also that not all 2KRO keyboards are equal, as their rollover may be quite different (or optimised towards different expected usages). For example, a 2KRO keyboard marketed towards gamers might take extra care to ensure that the commonly used WASD movement keys don’t cause rollover issues, allowing it to perform better when playing games that use these keys than keyboards built for general purpose use.

What happens if you exceed a keyboard’s rollover limit?

Two things can potentially go wrong if you press more keys simultaneously than a keyboard can handle.

The first is called ghosting, where a unpressed key is erroneously registered as having been pressed. For example, on a 2KRO keyboard, pressing down three keys simultaneously might cause four key presses to be registered.

Modern keyboards include ‘anti-ghosting’, a feature which essentially blocks additional keys from being registered once the rollover limit has been reached. Here, when three keys are pressed on our 2KRO keyboard, only two are registered, and the third one is blocked. This is why anti-ghosting is also called blocking or jamming.

Capture

How do I test rollover?

Rollover can be tested using apps that you download or run online. Run the program, and press and hold an increasing number of keys. Ensure that each key is correctly shown on-screen when pressed and released.

It’s important to test as many key combinations as you can. Keys next to each other are often prone to not being recognised, so these make good targets. It also makes sense to test for the combinations that you’re likely to use. An FPS gamer, for example, might hold W, D, Q, Shift and Space.

It’s important to remember that rollover is a minimum, not a maximum. If your keyboard can correctly register some six key combinations, but it can’t correctly register one three key combination, then it is a 2KRO keyboard, not a 6KRO keyboard.

We like Aqua Key Test, a free program for Windows, and Microsoft’s online app. You can find more programs here, courtesy of the mechanical keyboards subreddit. You can also find a list of keyboards and their KRO values here, or ask for help in the comments below.

How do I get NKRO on my keyboard?

For a long time, keyboards could only achieve NKRO over the older PS/2 connector. This is why some mechanical keyboards come with a USB to PS/2 adapter in the box, even as PS/2 ports started to disappear from computers. If your keyboard comes with a PS/2 adapter and is marketed as having NKRO, you’ll almost certainly need to use that adapter to achieve full NKRO on your machine.

owls

Recently, more mechanical keyboards are able to offer NKRO over USB, often using the full-speed USB standard. These keyboards often come with a DIP switch or key that switches between 6KRO and NKRO, as the NKRO mode sometimes doesn’t work in non-Windows operating systems or in a computer’s BIOS.

If your keyboard comes with NKRO over USB, ensure that the NKRO mode is turned on and test it using the programs linked above to ensure it’s working.

What should I look for in a new keyboard?

6KRO is enough for rapid typists, competitive gamers and computer users of all types. There are some rare exceptions though — like two people using one keyboard, extremely rapid music games, music emulation or stenography. For these users, NKRO keyboards, whether over PS/2 or USB, may be worth looking for.

Most mechanical keyboards come with 6KRO or higher, while most rubber dome keyboards have less, but there are rare exceptions in both directions. If the rollover isn’t stated on the product page, try doing a search for NKRO or 6KRO plus the name of your keyboard, e.g. “Filco Majestouch-2 NKRO”. You can also ask us in the comments below, although we can’t promise to know this stat for every keyboard!

Here are some rollover figures for keyboards we sell:

Keyboard Rollover (USB)
Filco Majestouch 2 6KRO (NKRO on PS/2)
Filco Convertible 2
Filco MiniLa
6KRO
Max Keyboard Blackbird NKRO
CM Novatouch TKL NKRO
Matias Ergo Pro
Matias Tactile Pro
6KRO
Matias Quiet Pro
Matias Mini Quiet Pro
10KRO
Topre Realforce
Topre Type Heaven
6KRO
KBP V60
KBP V80
6KRO
Unicomp Endurapro
Unicomp IBM Style
2KRO
Cherry MX Board 6.0 NKRO
Cherry MX Board 3.0 14KRO

Wrapping up

Thanks for taking the time to read through our article. We hope it answered your questions, and we welcome your comments or further questions below.

Posted in Articles, Guides Tagged with: , , , , , , , ,

Bruce’s Blog — March 2016

bruce 300pxHello Everyone.

The last few months have flown by, it seems like yesterday I was writing about how we’re working on the website design and looking forward to Christmas.

And here we are now, the website is up and running and we’re all looking forward to some better weather.

The new website

Speaking of the website, please take a look and please don’t be afraid to feedback with any ideas. We need people to tell us how it works for them. Although the main design is complete, we are working on added functionality.

A screenshot of the new website.

A screenshot of the new website.

We have made it display equivalent US Dollar and Euro prices. So we will still take payment in UK Sterling but you are able to quickly check how that compares to other currencies. We have set it to calculate VAT as it would typically be in those areas, so the US Dollar price is without VAT, but the Euro price is with VAT. You can see how it looks here.

After much deliberation we decided on this as it represents what you would pay. But please feel free to let me know if this is not what you want to see, we can tailor it easily.

Mechanical & ergonomic keyboards remain popular

‘Surprise!’ – We’re still selling keyboards – Mechanicals are flying out the door. Filco, Matias and Topre in particular. It seems that once people find a keyboard that really is well made and uses the best components they are only too keen to buy. Our customers are very discerning and tend to know what they want. Quality keyboards and good service being top of the list. A keyboard that is a joy to use all day long is like gold.

Ergonomic models are making good ground and Mice to go with them. In many ways the mouse is more of a likely source of problems in an ergonomic sense. We ‘mouse’ so much more now, it can cause neck and shoulder pain and using the thumb-wheel scroll can cause finger troubles too.

The RollerMouse is one of several ergonomic mouse replacements.

The RollerMouse is one of several ergonomic mouse replacements.

There are some companies now who like to give you ergonomic advice and then offer to sell you the solution in the form of a mouse they just happen to have in stock. The professional ergonomists and physiotherapists that we work with are very uncomfortable with this, it is a conflict of interest. Do they want to fix your neck problem? Or do they want to sell some stock Most of these guys do a one week course, after which they call themselves experts.

We always stress that if you are feeling pain and you think it may relate to your computer use you must see your own GP or a qualified medic. They may suggest a product we don’t have, or they may find that you are suffering for some completely unrelated reason.

New wares from CBS

Coming soon we hope to have a range of Monitor Arms and laptop stands and ergonomic accessories from UK Manufacturer Colebrook Bosson Saunders. CBS for short.

CBS produce a range of ergonomic IT products.

CBS produce a range of ergonomic IT products.

Not so well known in the computer business, but CBS are very highly regarded amongst building interior designers and architects. We are really excited to have another set of top quality kit to add to make the desktop a nicer place to spend your time.

Wrap-up

Thanks for reading, do email me if I can answer any questions.

Posted in Articles, Meta Tagged with:

Win a Filco MiniLa from LowkoTV & KeyboardCo!

FFKB68MUKB_02

We’re teaming up with popular YouTuber LowkoTV to give away a Filco MiniLa 60% size mechanical keyboard. Enter using the Rafflecopter box below!

a Rafflecopter giveaway

You can get more entries for following Lowko and KeyboardCo on Twitter, visiting our Facebook pages and tweeting about the contest.

Thanks for entering and please share the competition with your friends!

The keyboard comes with black switches and is available in USA (ANSI) or ISO (UK, Nordic) layouts. For more information about the Filco MiniLa, please see our review of the keyboard or our product pages linked below:

Posted in Articles Tagged with: , , , , , ,

Contour RollerMouse Red review

IMG_5870

Today we’re looking at Contour’s RollerMouse Red, an ergonomic alternative to a mouse.

IMG_5881

The RollerMouse is an interesting peripheral, with a design that isn’t like most other mouse replacements. It sits below your keyboard, with a textured bar that sits along the track the width of the average keyboard and number pad. The bar can run along the track, and also may rotate, giving you two axes of movement. In addition, you can also press down on the RollerMouse to do a left click. Dedicated keys for left and right click (as well as double click, copy and paste) are found just below the roller. There’s also a clickable scroll wheel here, completing the functions you’d expect to find on a mouse.

IMG_5891

Using the RollerMouse is surprisingly natural – I expected it to be a bit hard to control, but instead it was quite simple. The tracking feels precise, and this no doubt helps a newcomer to quickly become acquainted with the device’s method of operation. It takes a bit of time to train yourself to move below the keyboard instead of to the right when you’re looking for your mouse, but once you’ve achieved this then you’ll benefit from rapid access to a pointing device. The RollerMouse feels as accurate as a high-end gaming mouse; I had no issue playing games like Civilization V as well as surfing the web, typing documents and even using Photoshop.

As well as being faster to reach than a mouse sitting to the right (or left) of your keyboard, the RollerMouse is also ergonomically better than a traditional mouse. You can put your keyboard and RollerMouse directly below your monitor, and keep your wrists at a comfortable orientation. Combined with changing your position and taking breaks as you work, you should feel much better after a day with the RollerMouse than with a standard mouse. The integrated wrist rest helps here as well, letting you get a bit of relief while typing. This saves damage and stress to your shoulders, neck, elbows and wrists. If you struggle with RSI (or want to avoid it), then the RollerMouse should help.

IMG_5897

The RollerMouse is made from all high-quality materials: aluminium for the body, leatherette for the (removable) wrist rest, and solid-feeling plastic for the rollerbar. It feels solid and weighty for its size, and I would expect that to translate into rock-solid durability. It’s also relatively stylish, which isn’t surprising for a product that won a red dot design award in 2013.

IMG_5874

It’s also highly adjustable. Of course, you can adjust the speed of the RollerMouse, letting you trade off between speed and accuracy. It goes everywhere from 800 to 2400 DPI, thanks to a “twin-eye” laser sensor. You can also adjust the volume of the clicks made when you press down on the roller, letting you get a comfortable level of audible feedback. The force required to register a press on the roller can also be adjusted; I ended up disabling presses entirely because I was using left and right mouse buttons below. You are also encouraged to get the positioning between the keyboard and the RollerMouse right; you even get risers for your keyboard to make sure it’s at a comfortable height. It was really nice to have this level of customisability.

IMG_5882

Installation is a breeze; just a case of taking it out of the box, removing the thing that says ‘remove’ and plugging it in. There are no special drivers required on Windows or Mac, and everything just works. You can then adjust the default settings if you like (as above), but you may choose not to do so. Even the box feels premium, with tough plastic surrounds for each component. Combined with the longevity of the RollerMouse itself, I feel that it could last for decades, even being passed down from generation to generation!

IMG_5887

The RollerMouse Red is available from The Keyboard Company via the links below. You can also pick up the RollerMouse Red Plus, which comes with a longer wrist rest for enhanced support.

We actually offer the RollerMouse with a 30 day money back guarantee; you can try it out for a month and get your money back if you decide to return it. Please see the product pages linked above for the full details!

Posted in Articles Tagged with: , , ,

Filco Convertible 2: hands-on review

Update July 2017: Good news, everyone! Full-size Convertible 2 keyboards with MX Brown switches will be available this summer in UK, German or Swedish layouts (ISO). MX Blue switches will also be available, for UK layouts only. Click here for the full EU range, or here for USA layout keyboards.

IMG_3868

Today, like many days, I’m writing a lengthy article on a full-size Filco keyboard. I’m hitting around 80 words per minute, lovingly listing specifications and technical tips. Normally I’d be at home, but today I’m on the train – and I’m typing on my phone wirelessly. The keyboard I’m using isn’t a standard Filco; it’s the Convertible 2. It’s called the Convertible because it can work like a traditional USB keyboard when a wire is plugged in, but it’ll just as happily connect to a phone, tablet or laptop over Bluetooth when you’re sitting on the couch or on the move.

Getting set up

Connecting to the Convertible 2 for the first time is pretty simple – just turn on the Bluetooth switch, then press the ‘clear memory’ button, and you’ll be able to pair the keyboard with your phone or laptop as usual. Using the keyboard again is simpler – just turn on the keyboard, and you’ll automatically reconnect.

IMG_3865

If you want to connect to multiple devices, you can. Just use Ctrl + Alt + Fn, then 1, 2, 3 or 4 to switch to one of the four profiles, and you’ll automatically connect to the saved device if it’s within range. This works really nicely for switching between your laptop and a phone, or a phone and a tablet. You can be typing on your laptop, get a text on your phone and instantly be able to bang out a lengthy reply.

IMG_3892

Of course, sometimes you might prefer the simplicity of a USB connection. Simply connect the provided mini USB cable to your PC or laptop, and set profile 5 with Fn + 5, and you’re back to a completely standard USB keyboard. Once connected you’ll automatically use the USB source for power, saving your AA batteries, and you can even switch back to a wireless connection while continuing to get power from USB. You could even use a USB wall adapter, like the one that came with your phone, to get the power you need.

Rock solid reliability

After you’re connected, you’ll get precisely the same excellent typing experience as you would on a standard Majestouch-2 keyboard. You get a full layout, including numberpad, and your choice of Brown, Blue or Red switches. The chassis is the same too, so you get that traditional solid plate-mounted feel and rock-solid reliability.

IMG_3879

Actually, the typing experience will be a little better on the Convertible 2, as the inclusion of the Fn key has also let Filco include a set of media controls on F1-F3 and F5-F8. You can adjust your volume, skip forward and back, play and stop. It’s pretty darn convenient.

As the layout is identical (with the Fn key replacing the little-used Menu key), you can easily pick up custom keycaps for the Convertible 2 as well.

IMG_3874

The Convertible 2 is rated to operate for 6 months on a single charge from the pair of AA batteries before that low battery LED starts showing. And of course, if you’re ever running low then you can always choose to use USB power instead.

My hands-on impressions

The Convertible 2 has been a blast to test. After trying so many crazy gaming, ergonomic and compact keyboards, it’s felt great to get back to the standard for mechanical excellence. The full-size keyboard feels great for typing and gaming, with a standard layout, light keycaps, a sturdy plate-mounted board and no distractions.

IMG_3882

If you’re going to use your Bluetooth keyboard primarily on the move, then it makes sense to pick up a compact board that can travel with you easily. On the other hand, if you want to have just one keyboard wherever you are, you can’t do better than the Convertible 2.

Full size, top quality, at home or on the go.

IMG_3867

Links for more!

For more details on the Convertible 2 or to place your order, check the links below:

Update July 2017: Good news, everyone! Full-size Convertible 2 keyboards with MX Brown switches will be available this summer in UK, German or Swedish layouts (ISO). MX Blue switches will also be available, for UK layouts only. Click here for the full EU range, or here for USA layout keyboards.

Posted in Articles Tagged with: ,